Wednesday 26 October 2016

Cisco Conductor Works with WebEx CMR (Unscheduled)

This is to discuss how WebEx CMR can be integrated into Cisco Conductor / Telepresence Server environment. To do so, make sure that you have already a pair of expressway E/C to WebEx CMR.
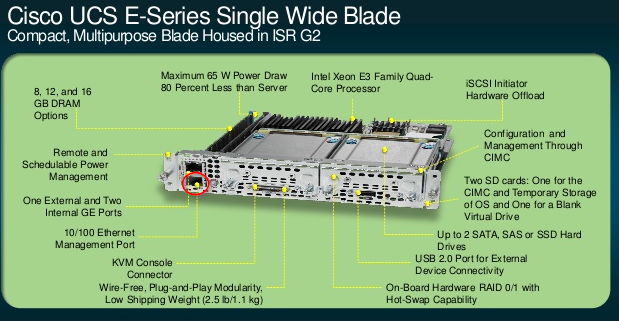
In case you have enough knowledge in different types of Screen license required per call, Here is the TP datasheet:

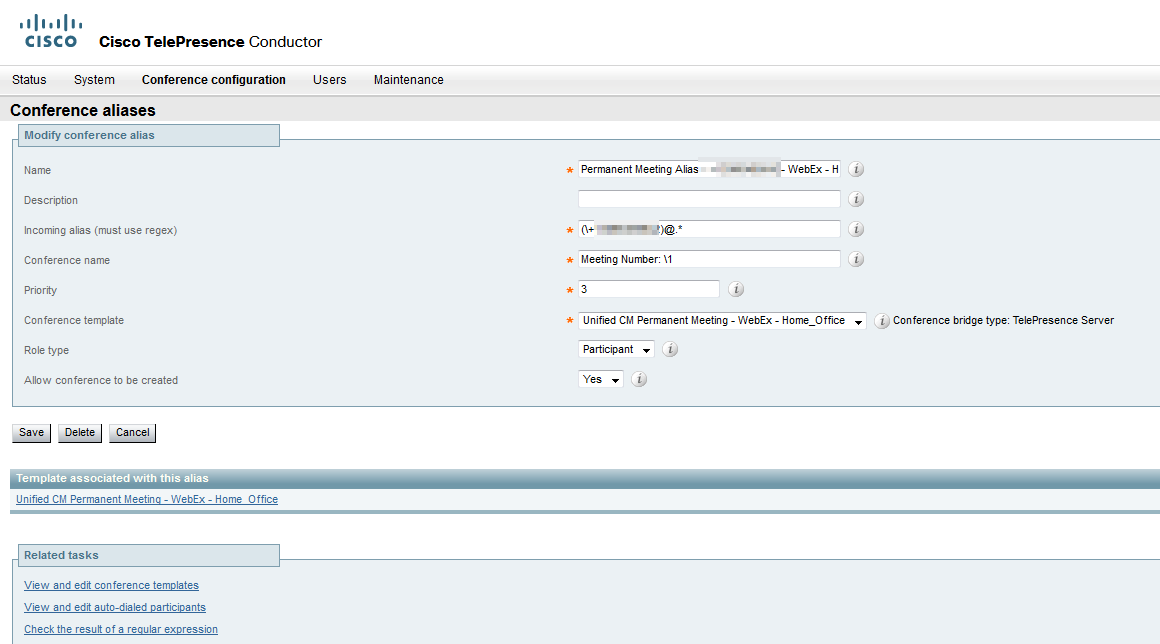
  1. Make a dedicated Conference alias for WebEx CMR
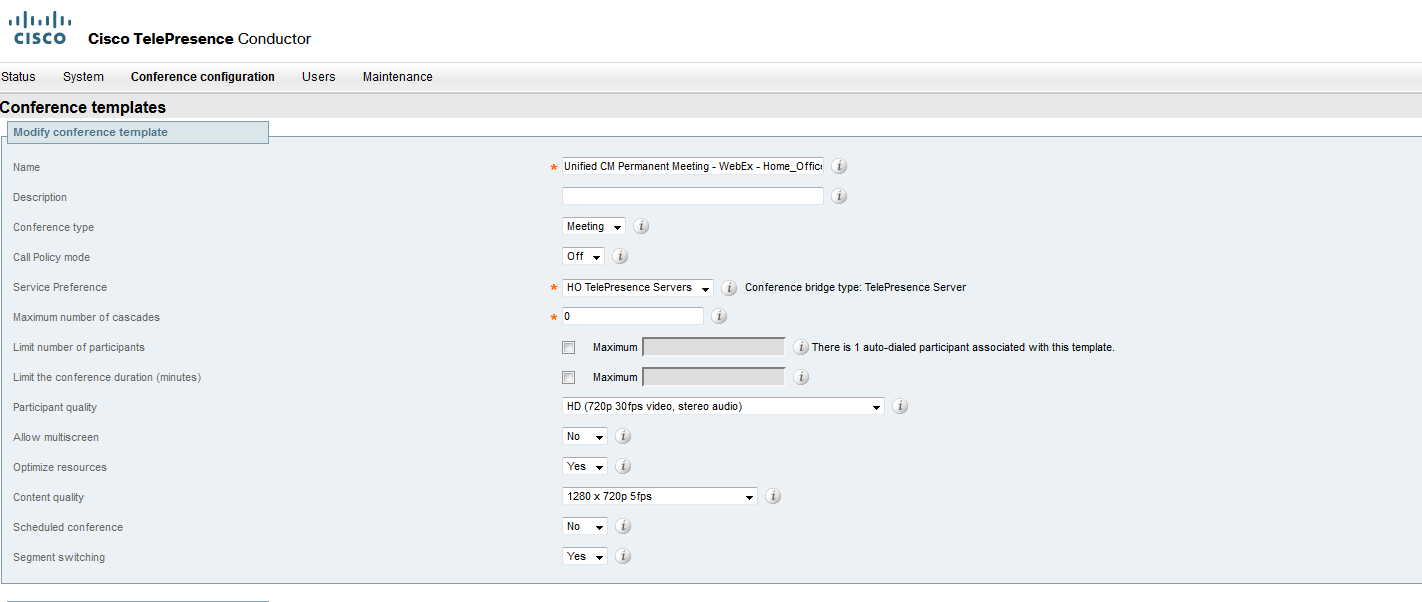
  1. Conference Template
No to allow multiscreen & 720 3fps will consume ½ license per call

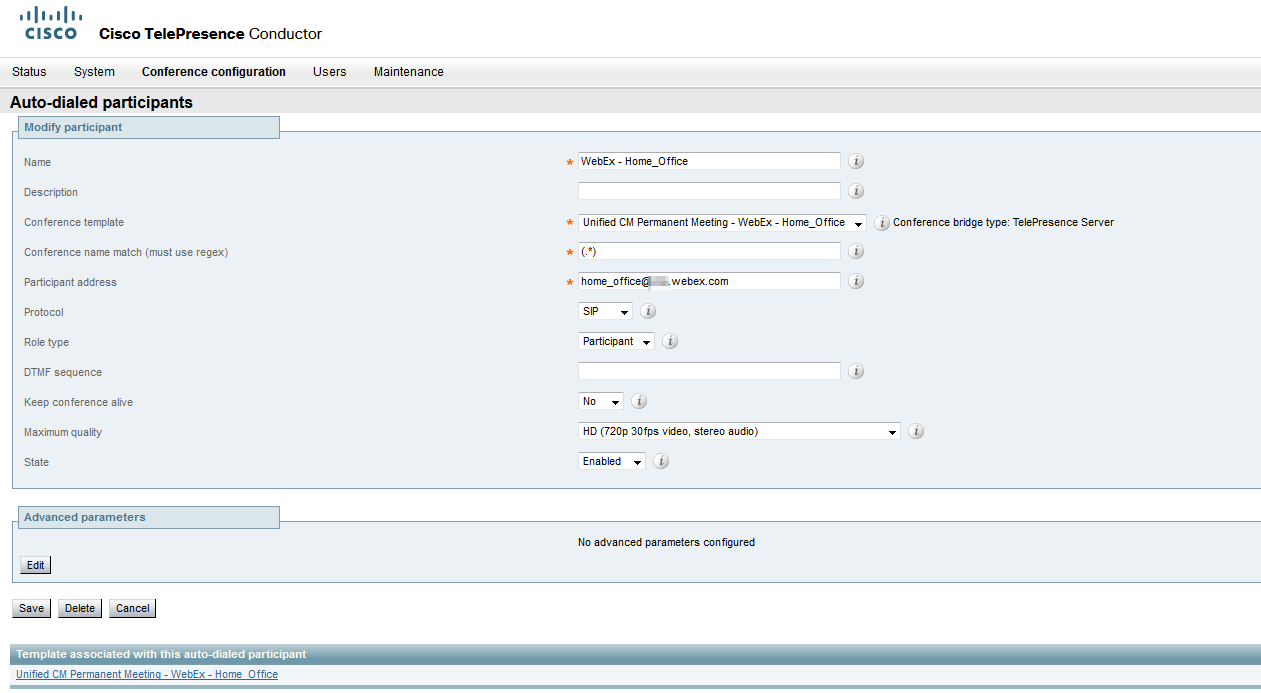
  1. Auto-dialed participants
Fill in your CMR enabled WebEx account name in  ABC@DEF.webex.com format

  1. Enable CMR feature
Go to WebEx administration page > editor user >check Collaboration Meeting Room for the user.

  1. Because unscheduled meting template doesn’t give TP the ability to dial PIN number. We have to host meeting from a laptop first.

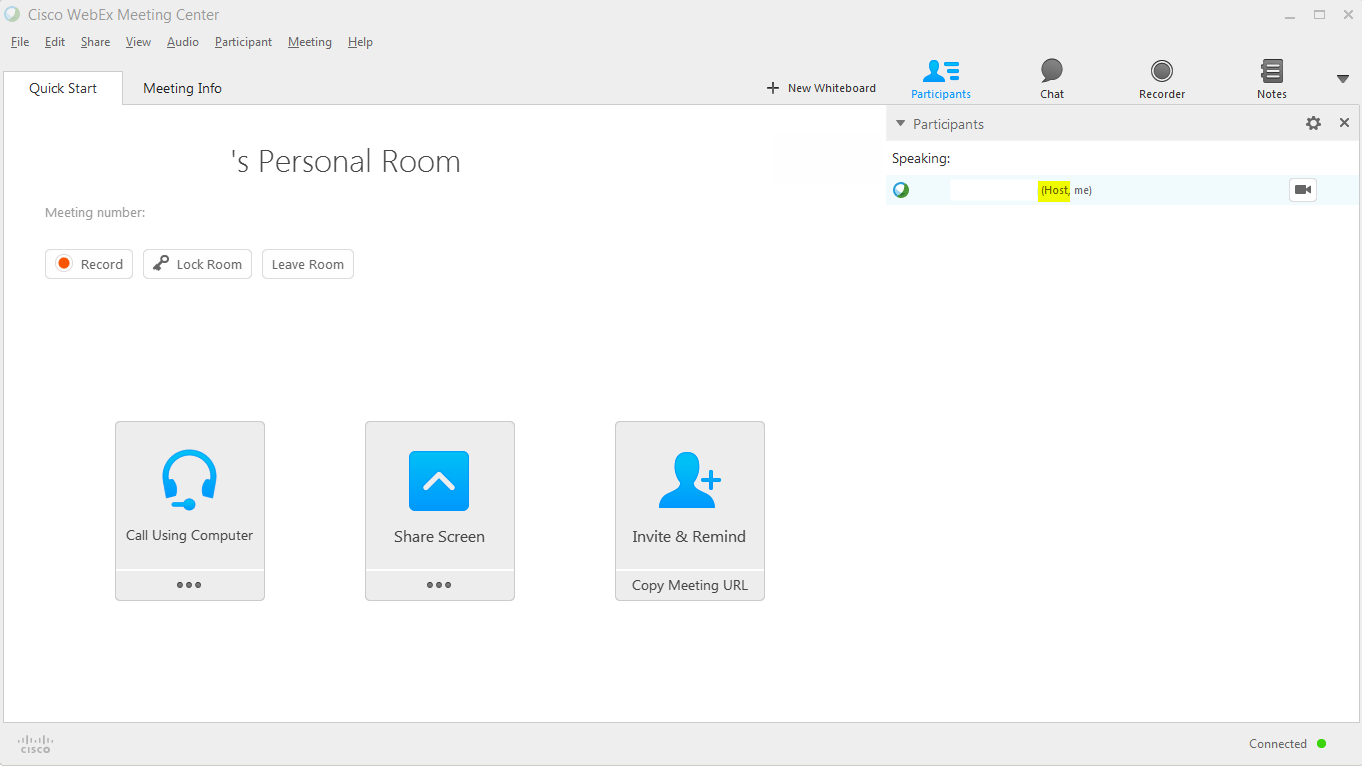
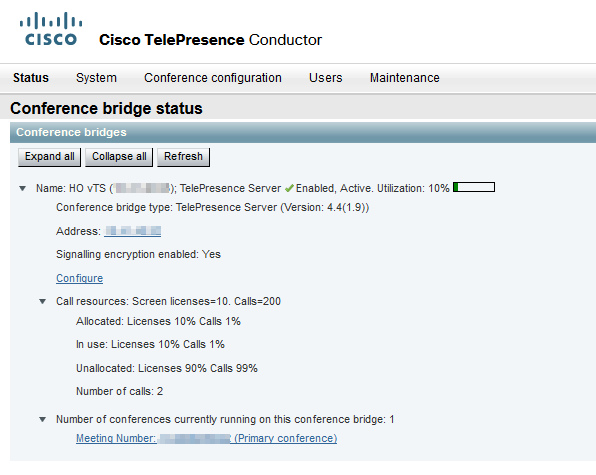
  1. Use a telepresence unit to call in alias number. This will have TPS start a bridge and call and join  WebEx CMR as a participant. Then go to Conductor and check utilization of TPS resource is reaching 10%(2 calls, TP + WebEx)


Monday 10 October 2016

Installation UCS E140S M2

Installation
After physically installing it, must reboot the router.


2921A#show diag | include FRU
        Product (FRU) Number     : CISCO2921/K9
        Product (FRU) Number     : PWR-2921-51-AC
        Product (FRU) Number     : UCS-E140S-M2/K9


Config CIMC port

In this step, we make use of 1/0 as the internal interface, which gives us the advantage of working on installing UCS-E server in a hurry because we can access CIMC right away once we slide it in the router.
interface ucse1/0
ip unnumbered Port-channel1
imc ip address 10.11.0.177 255.0.0.0 default-gateway 10.11.0.101
 imc access-port shared-lom console

ip route 10.11.0.177 255.255.255.255 ucse1/0


Config CIMC


       Web GUI login with default admin / password, change it after login.


Managing RAID
Enable RAID 1 to be a boot drive
cid:image009.jpg@01D220A5.2E8CFC90


Add image:


Machine generated alternative text: cisco Integrated
Cisco INC Hostname:
istged n as:
Summary
Inventory
Sensors
Remote Presence
BIOS
Power Policies
Faults and Logs
Host Image Mapping
Troubleshooting
Add Image Delete Selected Image Lir
Download Dialog
Download image from: rrp Server liii
Enter the FTP Server and file information, then click ‘Download to begin the download. After
the image has been downloaded please refresh the Host Image Mapping Page.
FTP server ip address 10.41.31.139
FTP file path I\vMwa-vMv50r-In5ta1-6.0.0pdate02
Username: Icisco
Password:
Cancel Download


cid:image011.jpg@01D220A5.2E8CFC90

Changing Boot order


cid:image012.jpg@01D220A5.2E8CFC90 


Install ESXi 6 from KVM
GE2 is an external physical interface which only can be seen by the hypervisor.  Using this external interface dodge potential IOS malfunctioning, such as high CPU.


cid:image013.png@01D220A4.EC48B900


EXSi Configure Management Network to GE2
Choosing GE2
cid:image016.jpg@01D220A5.2E8CFC90


cid:image017.jpg@01D220A5.2E8CFC90

In case you want to know where to get EXSi Free license:

www.vmware.com/go/get-free-esxi