Contents
Setting up Microsoft™ AD FS 2.0
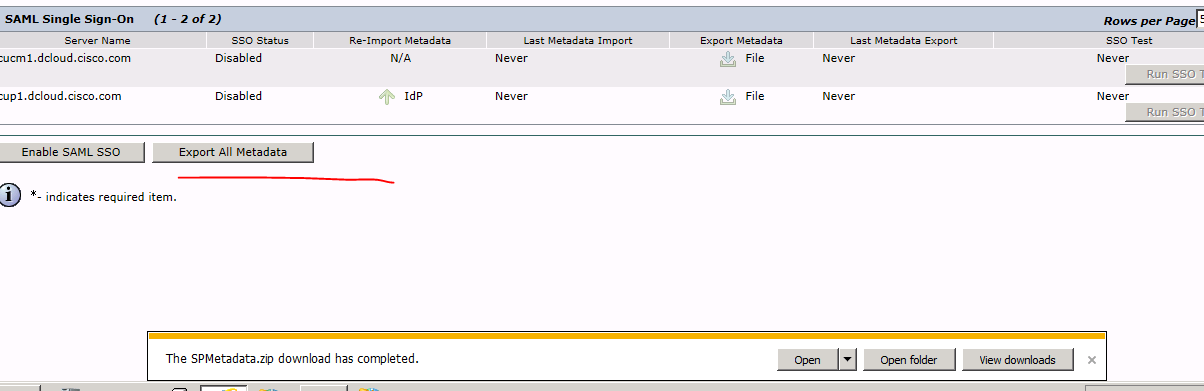
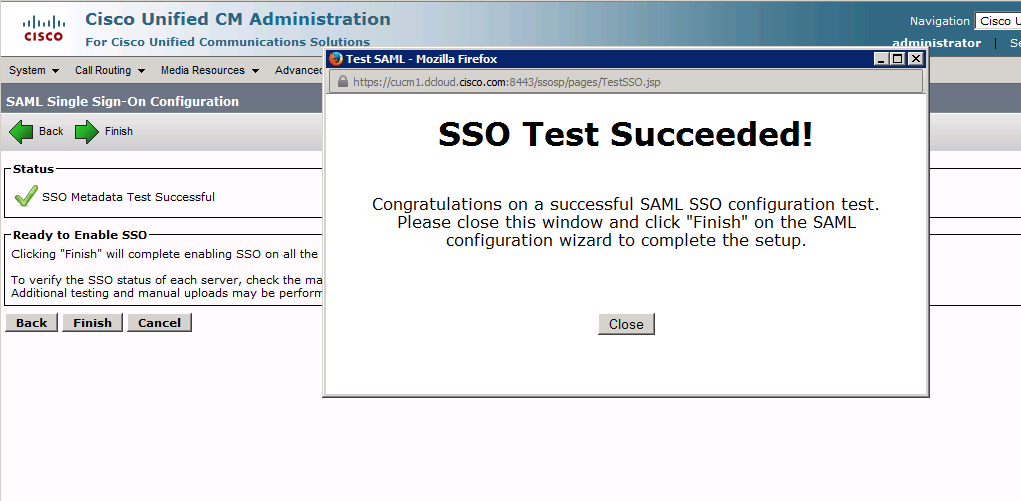
System > SAML Single Sign-On

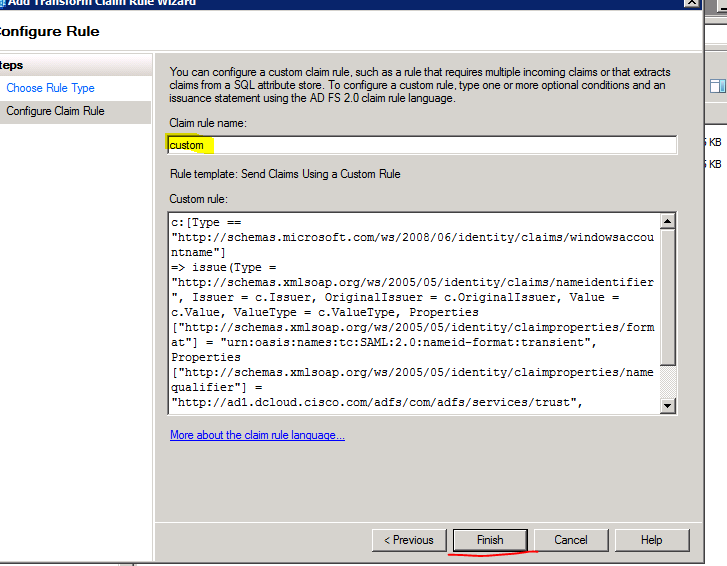
c:[Type == "http://schemas.microsoft.com/ws/2008/06/identity/
=> issue(Type = "http://schemas.xmlsoap.org/ws/2005/05/identity/cl
=> issue(Type = "http://schemas.xmlsoap.org/ws/2005/05/identity/cl
Setup Cisco Unified CM Voice & Video SSO

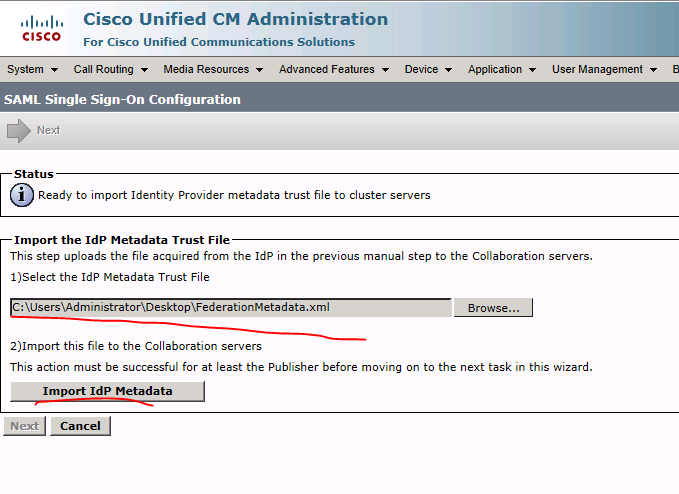
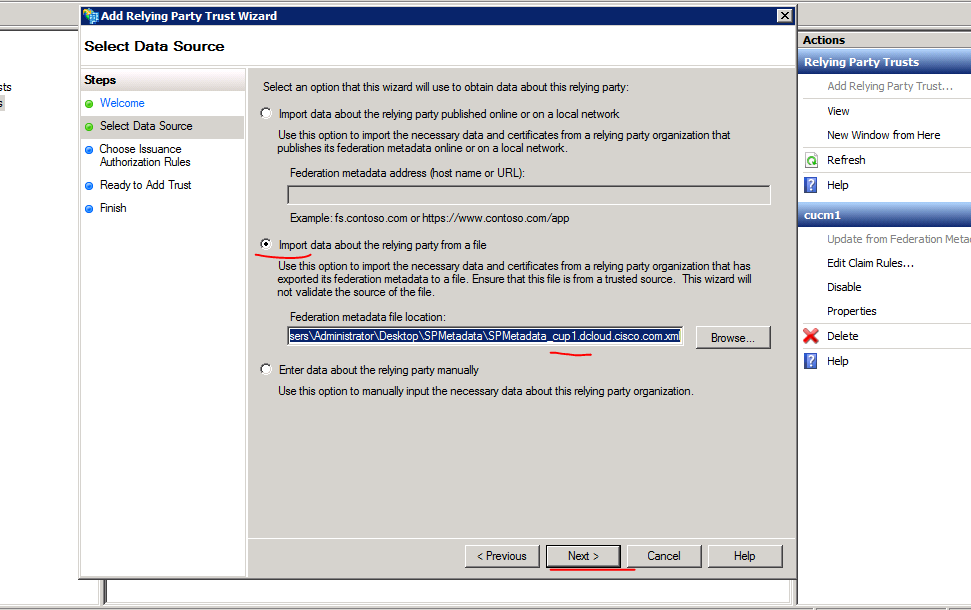
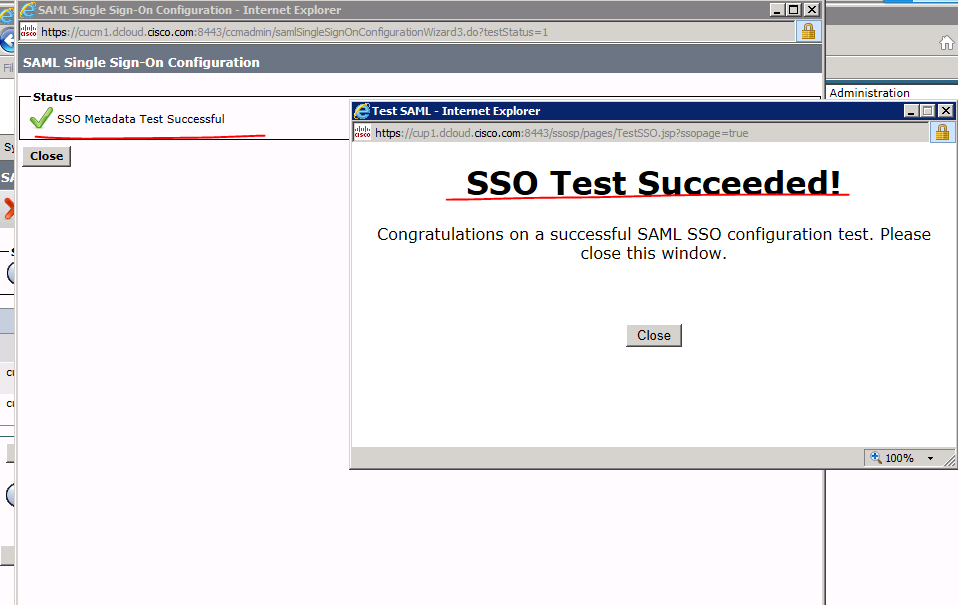
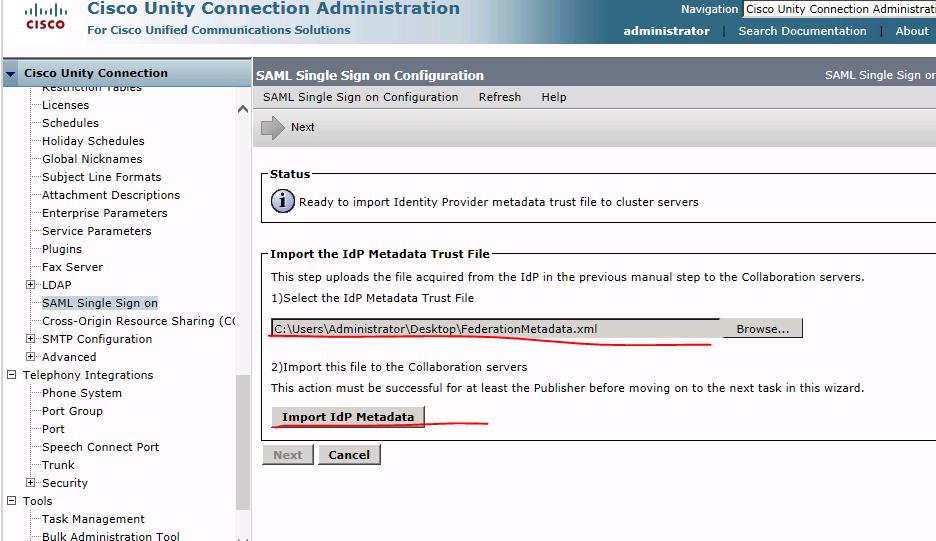
Download the metadata from your AD FS server by navigating to the following URL: https://hostname/federationmetadata/2007-06/federationmetadata.xml


Close Brower
Setting up ADFS2 for Unified CM IM&P

Deploy Microsoft Rollup Update 3 package


At the PowerShell prompt type: set-executionpolicy unrestricted.
At the PowerShell prompt type the three command lines below. You can copy all at one time and paste them in together.
cd "$env:programfiles\active directory federation services 2.0\sql"
Add-PSSnapin microsoft.adfs.powershell
.\PostReleaseSchemaChanges.ps1


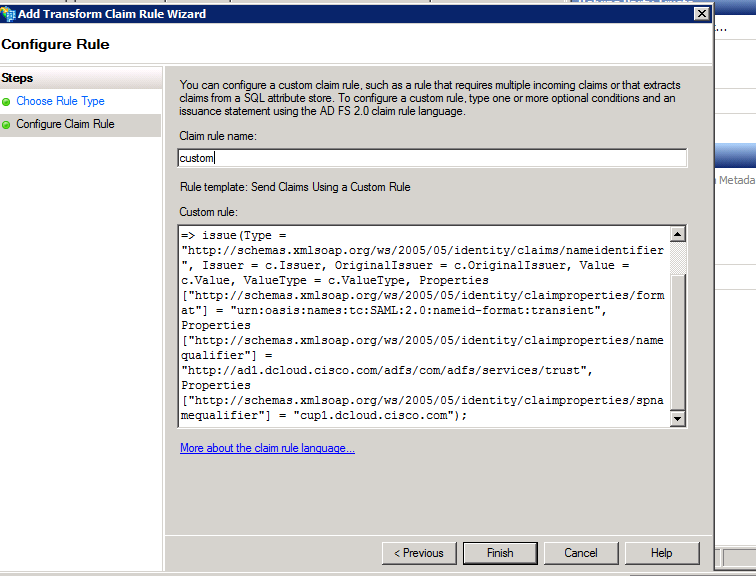
c:[Type == "http://schemas.microsoft.com/ws/2008/06/identity/claims/windowsaccountname"]
=> issue(Type = "http://schemas.xmlsoap.org/ws/2005/05/identity/claims/nameidentifier", Issuer = c.Issuer, OriginalIssuer = c.OriginalIssuer, Value = c.Value, ValueType = c.ValueType, Properties["http://schemas.xmlsoap.org/ws/2005/05/identity/claimproperties/format"] = "urn:oasis:names:tc:SAML:2.0:nameid-format:transient", Properties["http://schemas.xmlsoap.org/ws/2005/05/identity/claimproperties/namequalifier"] = "http://ad1.dcloud.cisco.com/adfs/com/adfs/services/trust", Properties["http://schemas.xmlsoap.org/ws/2005/05/identity/claimproperties/spnamequalifier"] = "cup1.dcloud.cisco.com");
Setup Cisco Unified Communications Manager IM&P SSO


c:[Type == "http://schemas.microsoft.com/ws/2008/06/identity/claims/windowsaccountname"]
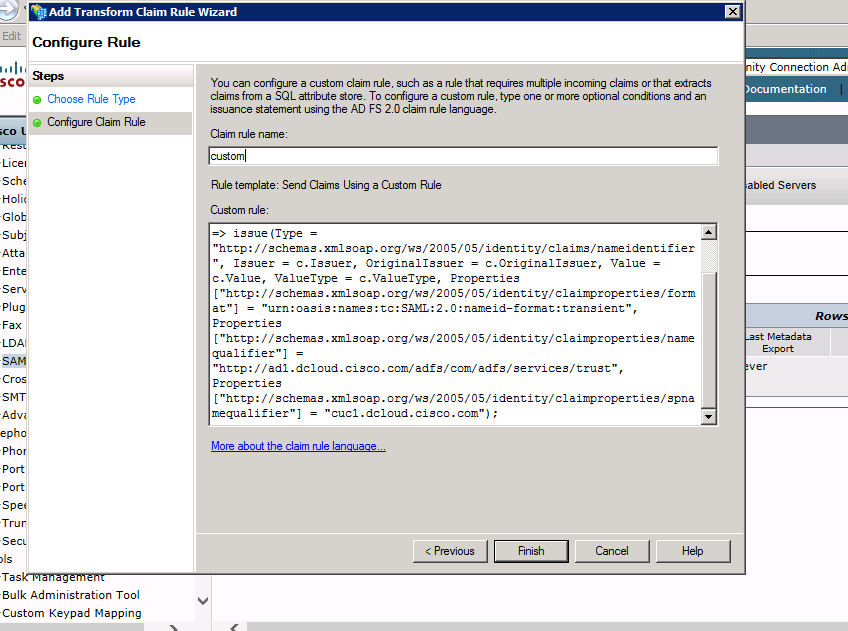
=> issue(Type = "http://schemas.xmlsoap.org/ws/2005/05/identity/claims/nameidentifier", Issuer = c.Issuer, OriginalIssuer = c.OriginalIssuer, Value = c.Value, ValueType = c.ValueType, Properties["http://schemas.xmlsoap.org/ws/2005/05/identity/claimproperties/format"] = "urn:oasis:names:tc:SAML:2.0:nameid-format:transient", Properties["http://schemas.xmlsoap.org/ws/2005/05/identity/claimproperties/namequalifier"] = "http://ad1.dcloud.cisco.com/adfs/com/adfs/services/trust", Properties["http://schemas.xmlsoap.org/ws/2005/05/identity/claimproperties/spnamequalifier"] = "cuc1.dcloud.cisco.com");

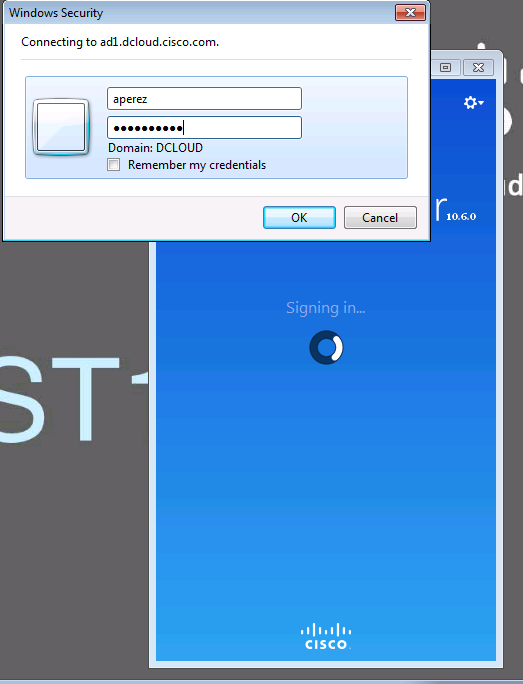
Verify operation of Username/Password based Authentication
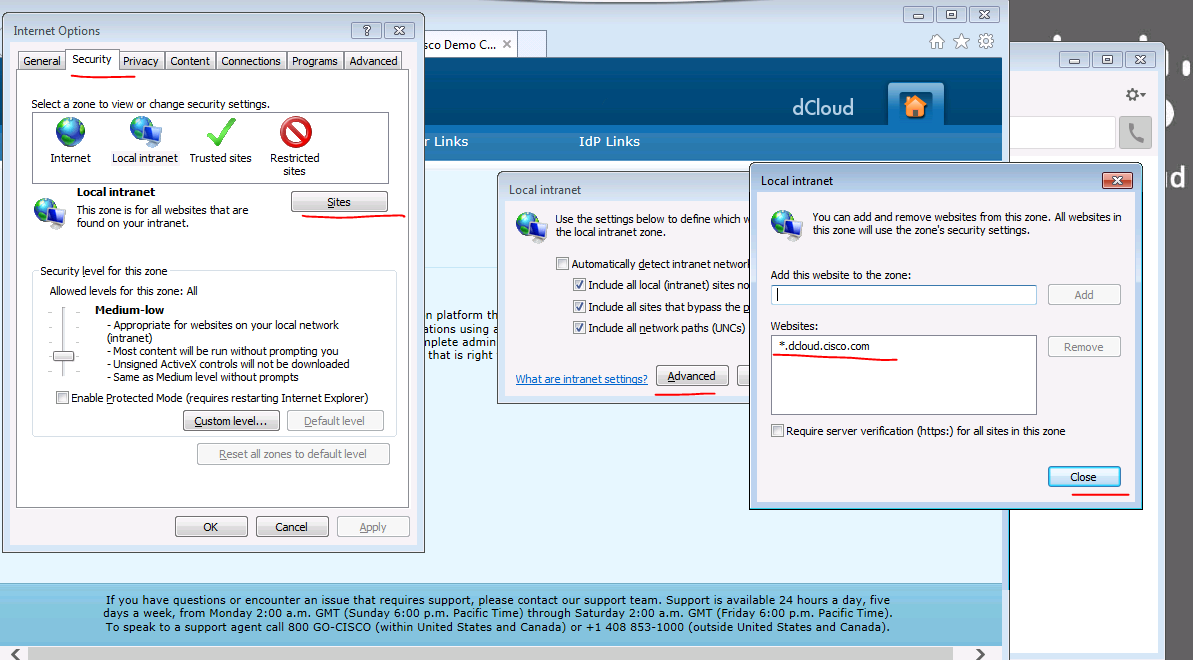
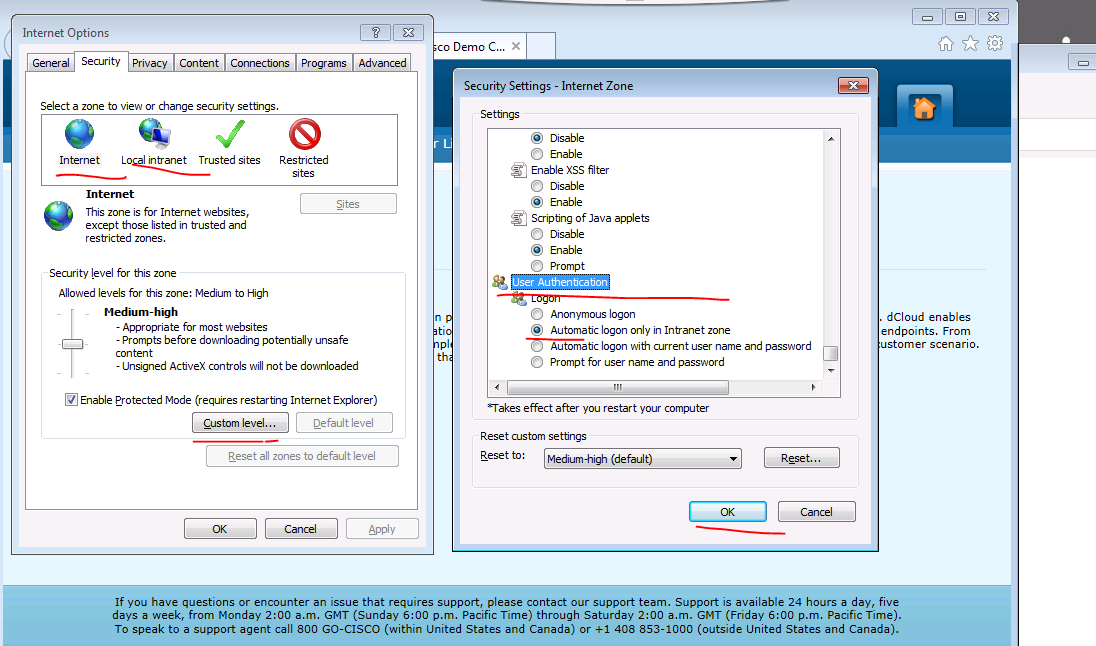
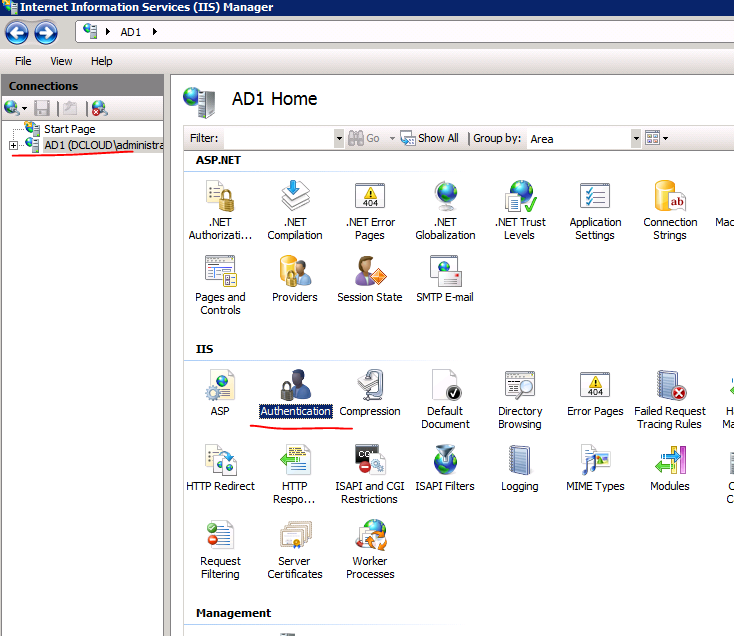
Kerberos based Authentication with AD FS 2.0
In this section, you are going to utilize the fact that the user is logged in to Active Directory. You will get rid of the username/password prompt at the SSO server and instead let the web browser use the Kerberos authentication of the Windows Domain.
Verify operation of Kerberos based Authentication
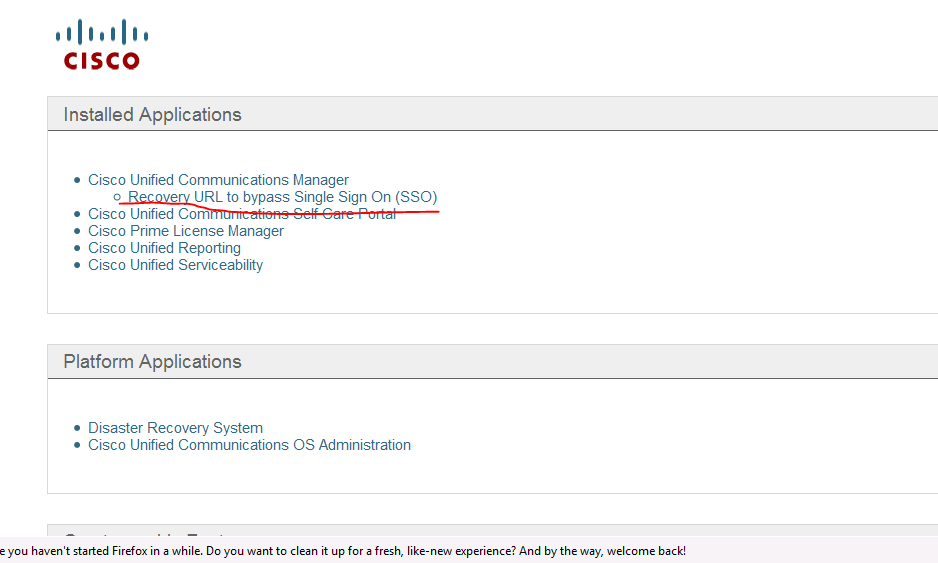
1. Close the browser and reopen. Navigate to Collaboration Server Links > Cisco Unified Communications Manager
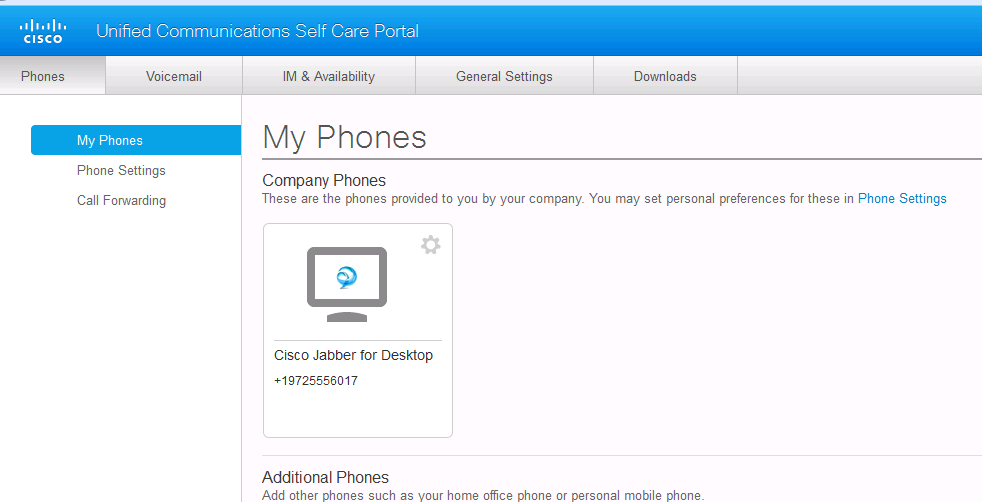
2. Click on Cisco Unified Communications Self Care Portal.
3. You should see the Self Care portal and the user will not be prompted for any authentication.
4. Double-click the Cisco Jabber shortcut on the workstation desktop. You can see that Jabber will not prompt for any authentication. At this point, Jabber will be fully authenticated.
5. Exit Jabber.
Certificates based Authentication with ADFS2.0

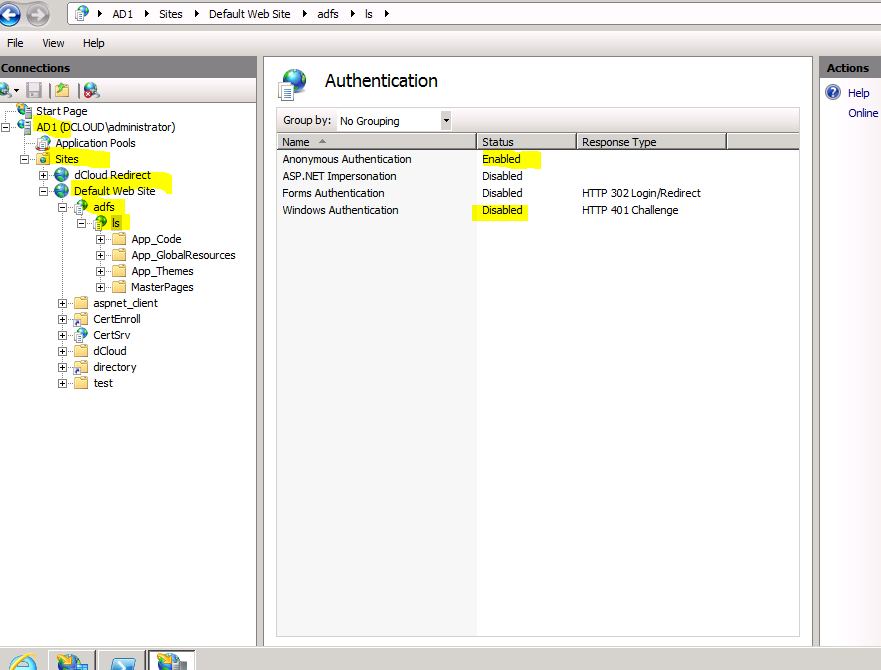
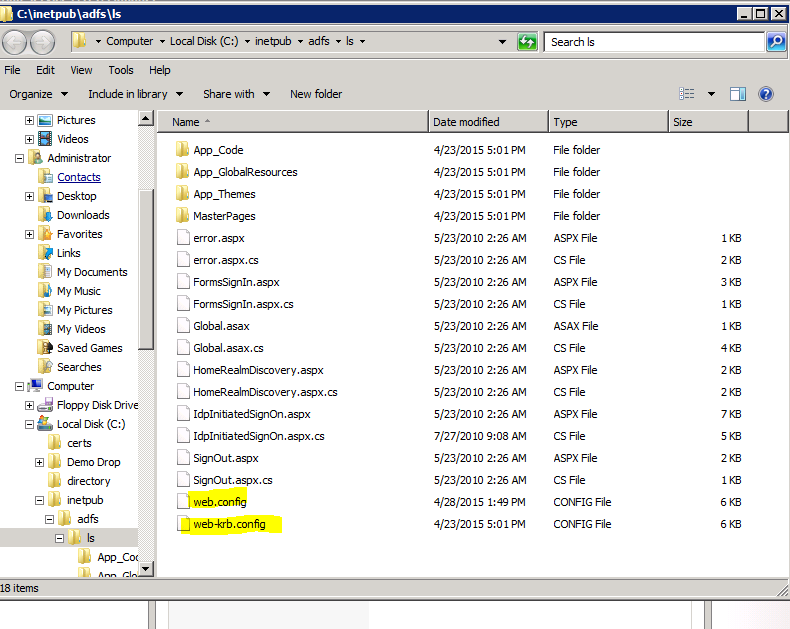
Rename the web.config file to web-krb.config and then rename web-certs.config to web.config.
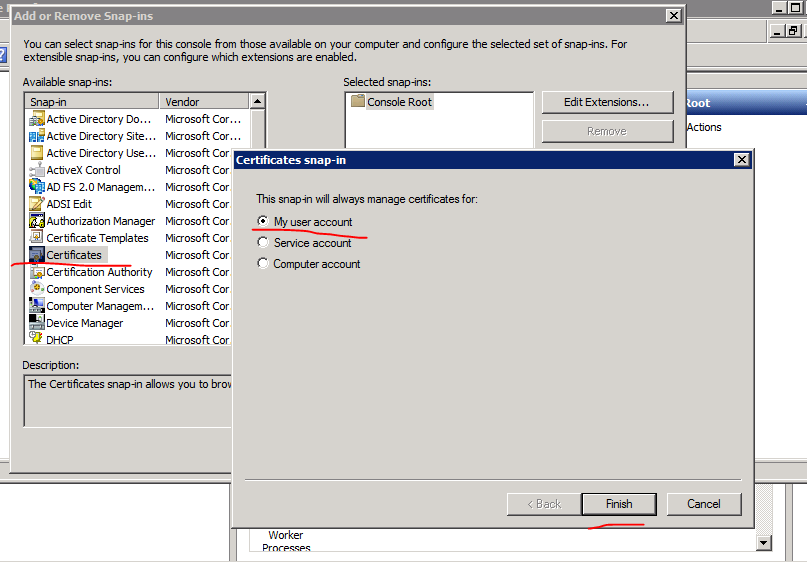
Create a user certificate to use for certificate-based authentication

Configure MS Internet Explorer to use the user certificate for authentication