Module 1: CUCM Video Lab – Conferencing
Introduction
This document describes the lab to configure Cisco Unified Communications Manager to use a Cisco TelePresence Conductor to manage the conference bridge resources for ad hoc and rendezvous conferences. TelePresence Conductor configuration, virtual TelePresence Server is also documented.
Following the steps in this deployment guide will allow you to configure the above devices to allow:
- Unified CM-registered endpoint to create an ad hoc conference by using its own “conference”, “join”, or “merge and accept” button to join multiple video participants together onto a conference bridge through a TelePresence Conductor.
- Unified CM-registered endpoint to dial a specific dial string and create a rendezvous conference through a TelePresence Conductor on one or more of the conference bridges.
TelePresence Conductor version XC2.3 can be configured to emulate conference bridges for Unified CM; using its back-to-back user agent (B2BUA) it can route the different types of conference call (ad hoc or rendezvous) to one or more conference bridges. These bridges can be Cisco TelePresence MCUs or Cisco TelePresence Servers. In this lab, we are using vTS.
With the TelePresence Conductor configured, the ad hoc and rendezvous requests are received by the TelePresence Conductor and it can use both conference bridges for ad hoc and rendezvous calls, thus making more efficient use of the conference bridge resources available.

Each location will have a dedicated IP address for ad hoc conferences and another dedicated IP address for rendezvous conferences.
Configuration of Conductor and Unified CM 10.0 and later for Ad Hoc and Rendezvous Conferences

Call flow with the TelePresence Conductor
The following sections show the call flows that occur when handling ad hoc and rendezvous calls.
Ad hoc call flow
This diagram shows the call flow for an ad hoc call:
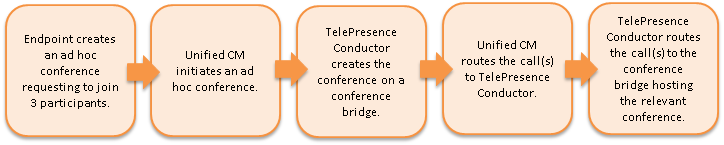
In TelePresence Conductor:
Once these parts of the call flow are complete, the calls are set up and media flows between the endpoint and the conference bridge.
Rendezvous call flow
This diagram shows the call flow for a rendezvous call:

In TelePresence Conductor:
(The dotted line indicates an optional step where auto dialed participant(s) are configured on the TelePresence Conductor for the relevant template.)
vTS
Pre-requisite
vTS has been deployed already with ova image. IP address has been configured. Encryption key, license key has been installed.
vTS configuration
Logon to vTS:
username: admin
password: no password
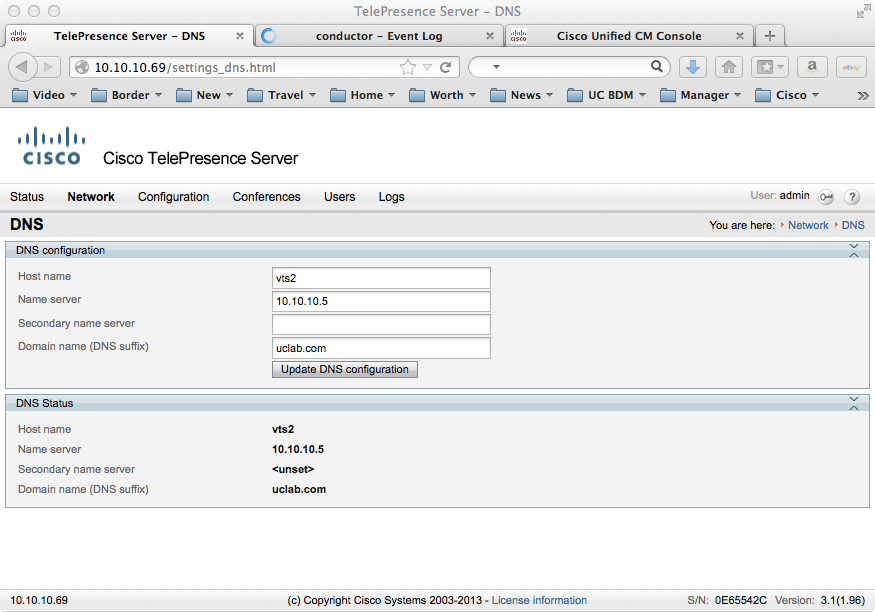
Configure DNS , hostname as follows (network->DNS):
Hostname: vts1
Name server: 10.10.10.5
Domain name (DNS suffix): uclab.com
Add a new user: this is for the conductor to control the vTS (users->add new user). Username: conductor, password: C1sc0123.
Access Rights: Administrator

Enable TLS for SIP signaling (network->services). uncheck TCP and UDP. Check encrypted SIP(TLS) and port should be 5061, click Apply changes

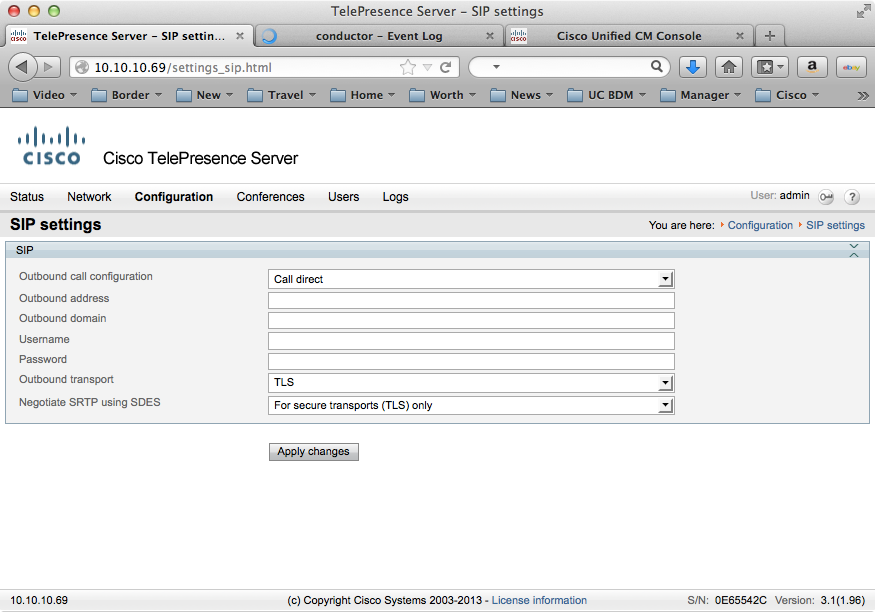
Configure SIP setting (Configuration->SIP) to “Call Direct”, TLS and secure transport only. Click Apply changes
Restart the VTS (Configuration->Shutdown) Click Shut down TelePresence Server. When prompted, click Click Confirm Shut down TelePresence Server. Click Restart TelePresence Server


Congratulations ! vTS has been configured. Now to Conductor.
Conductor
Pre-requisite
Conductor has been deployed with ova file. IP address has been configured. License has been preloaded. Also make sure root password is changed !
Conductor Configuration
Logon to conductor:
username: admin
password: C1sc0123
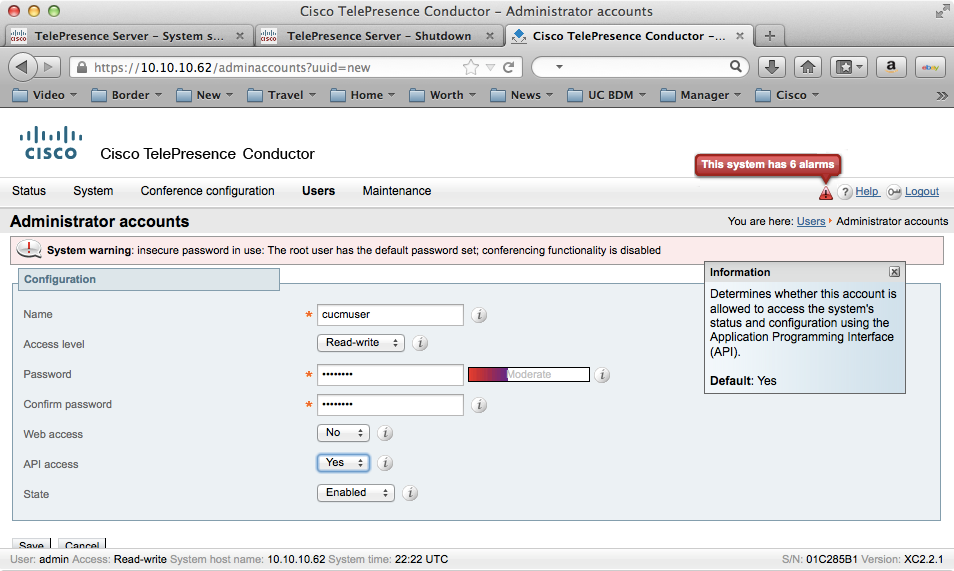
Create a new user for CUCM access (users->administrator account):
Click New
Use following settings:
Name: cucmuser
Access level:Read-Write
Password: C1sc0123
Web API access: Yes,
Web access: No
State: Enabled.
Click Save
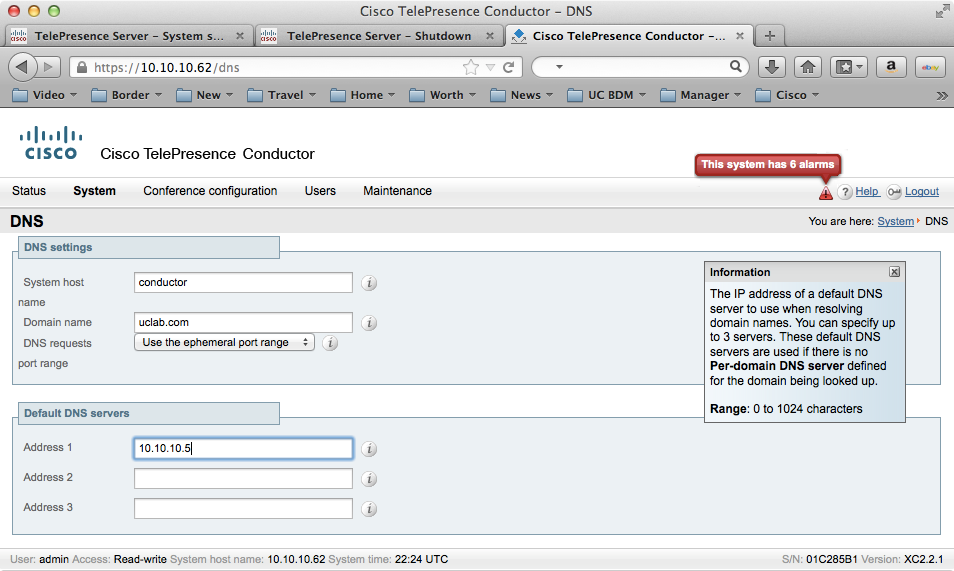
Change DNS settings (System->DNS):
System Hostname: conductor
Domain name: uclab.com
Default DNS servers
Address 1: 10.10.10.5
Click Save
Setup NTP (system->time)
NTP server 1: 10.10.10.5, Authentication : Disabled
Remove other default NTP to prevent system alarm

Verify that Status shows State: Synchronized

Add additional address for adhoc call and rendezvous calls (system->IP),.
Click New
Address: 10.10.10.63
Click Add Address
Click New
Address: 10.10.10.64
Click Add Address
In this lab, 10.10.10.63 is defined for adhoc calls and 10.10.10.64 is defined for rendezvous calls.
Additional addresses for LAN 1, should show 2 addresses per below:
Click Save

Restart (Maintenance -> Restart options
Click Restart … it will take a couple of mins, take a break …
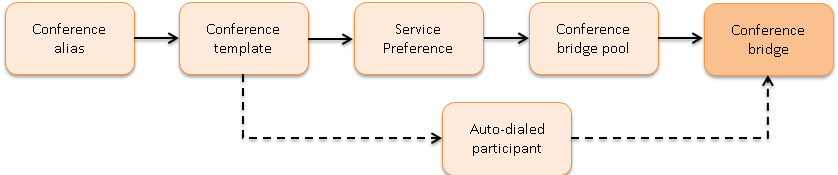
Conductor Conference Configuration
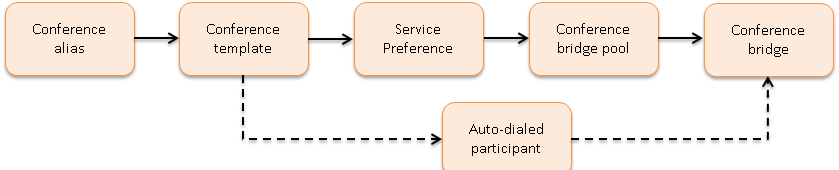
Now we are ready to configure the conductor as conference bridge. Refer to the diagram below, it shows how each configuration step is linked to overall call flow.
SETUP conference bridge
Logon to conductor:
username: admin
password: C1sc0123
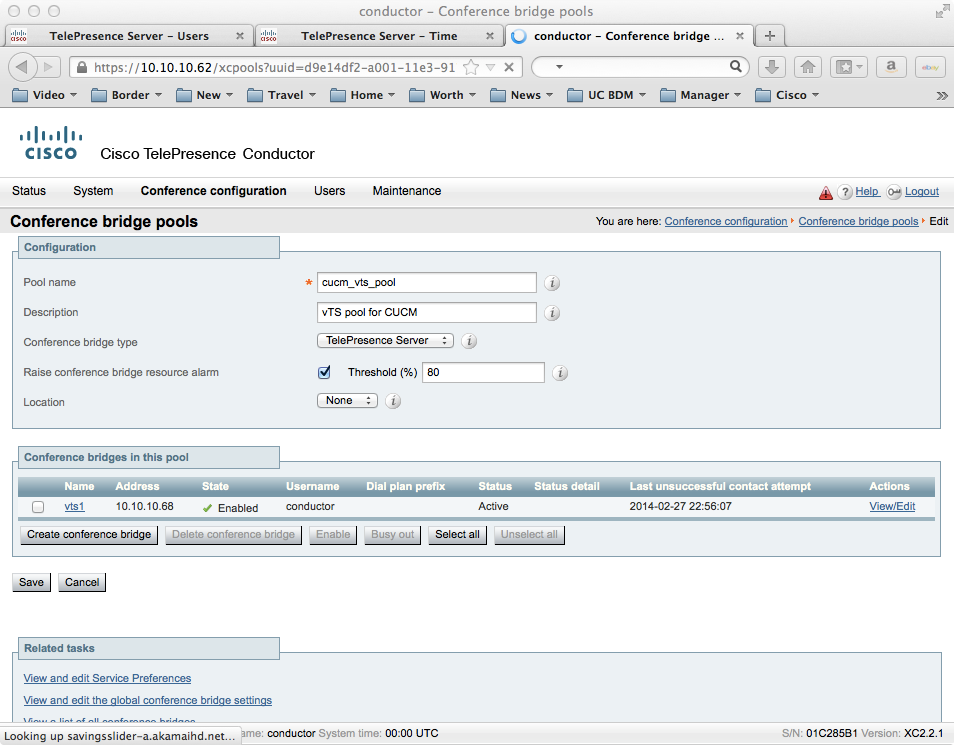
Create a TS conference bridge pool (Conference configuration > Conference bridge pools)
Click New
Create a new Conference bridge pool:
Pool name: cucm_vts_pool
Conference bridge type: TelePresence Server
Leave everything else as default & click Create pool

Create conferencing bridge (conference configuration->conference bridges)
Click New
Name: vts1
IP address: 10.10.10.68
Protocol: HTTP
Conference bridge username: conductor
Conference bridge password: C1sc0123
Conference bridge type: TelePresence Server
Conference bridge pool: cucm_vts_pool
SIP port: 5061
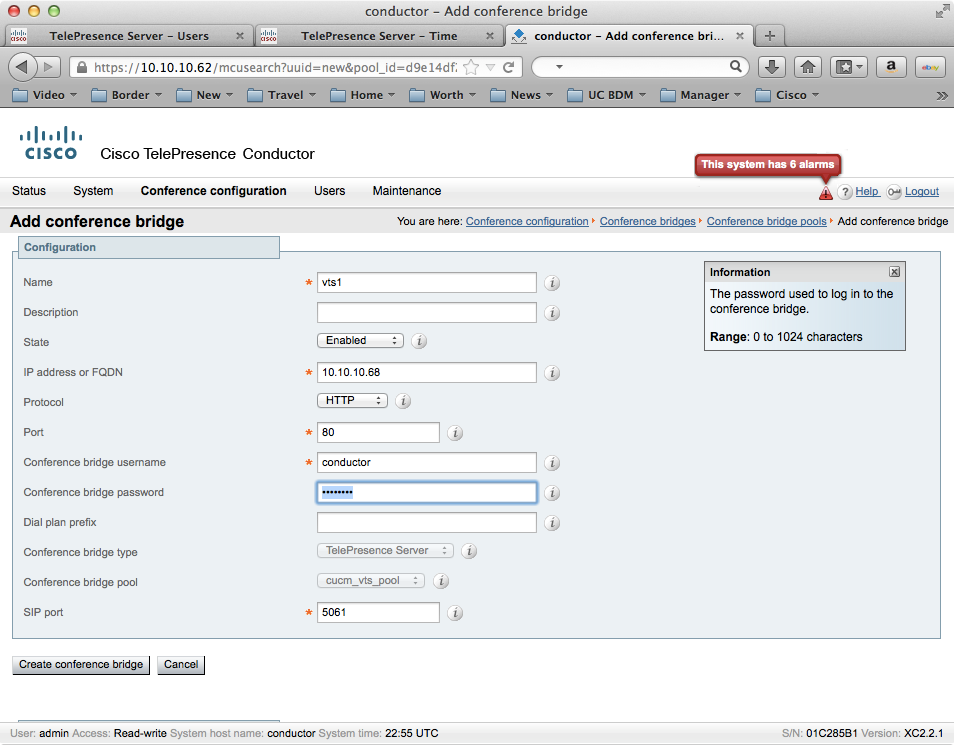
Click conference bridge
Verify State shows Enabled
Define Service Preference and select the bridge pool created.
Create new service preference (Conference Configuration->Service Preferences),
Click New
Service Preference Name: vTS_Serv_Pref
Conference bridge type: TelePresence Server
Click Add Service Preference

Select cucm_vts_pool in the Pool Name pull down menu.
Click save. Click vTS_Serv_Pref to verify bridge pool has been added to service preference
Create conference Template
Create Rendezvous conference template (configuration->conference template)
Click New
Name: CUCM Rendezous Meeting
Service Preference: vTS_Serv_Pref
All other field kept as default
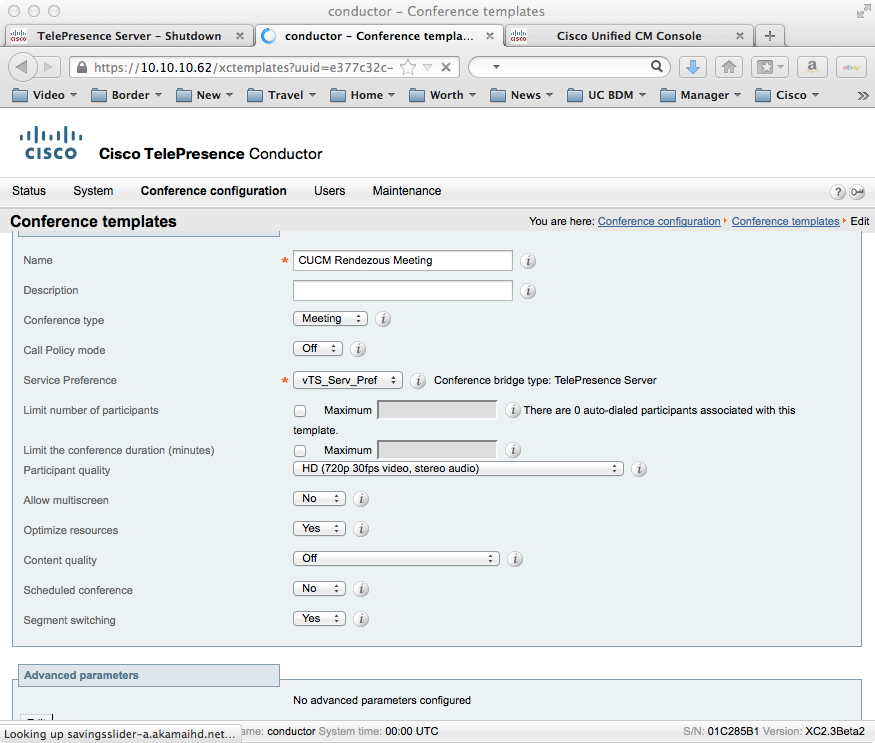
Click Create conference template
Create Adhoc conference template (configuration->conference template)
Click New
Name: CUCM adhoc meeting
Service Preference: vTS_Serv_Pref
All other field kept as default

Click Create conference template
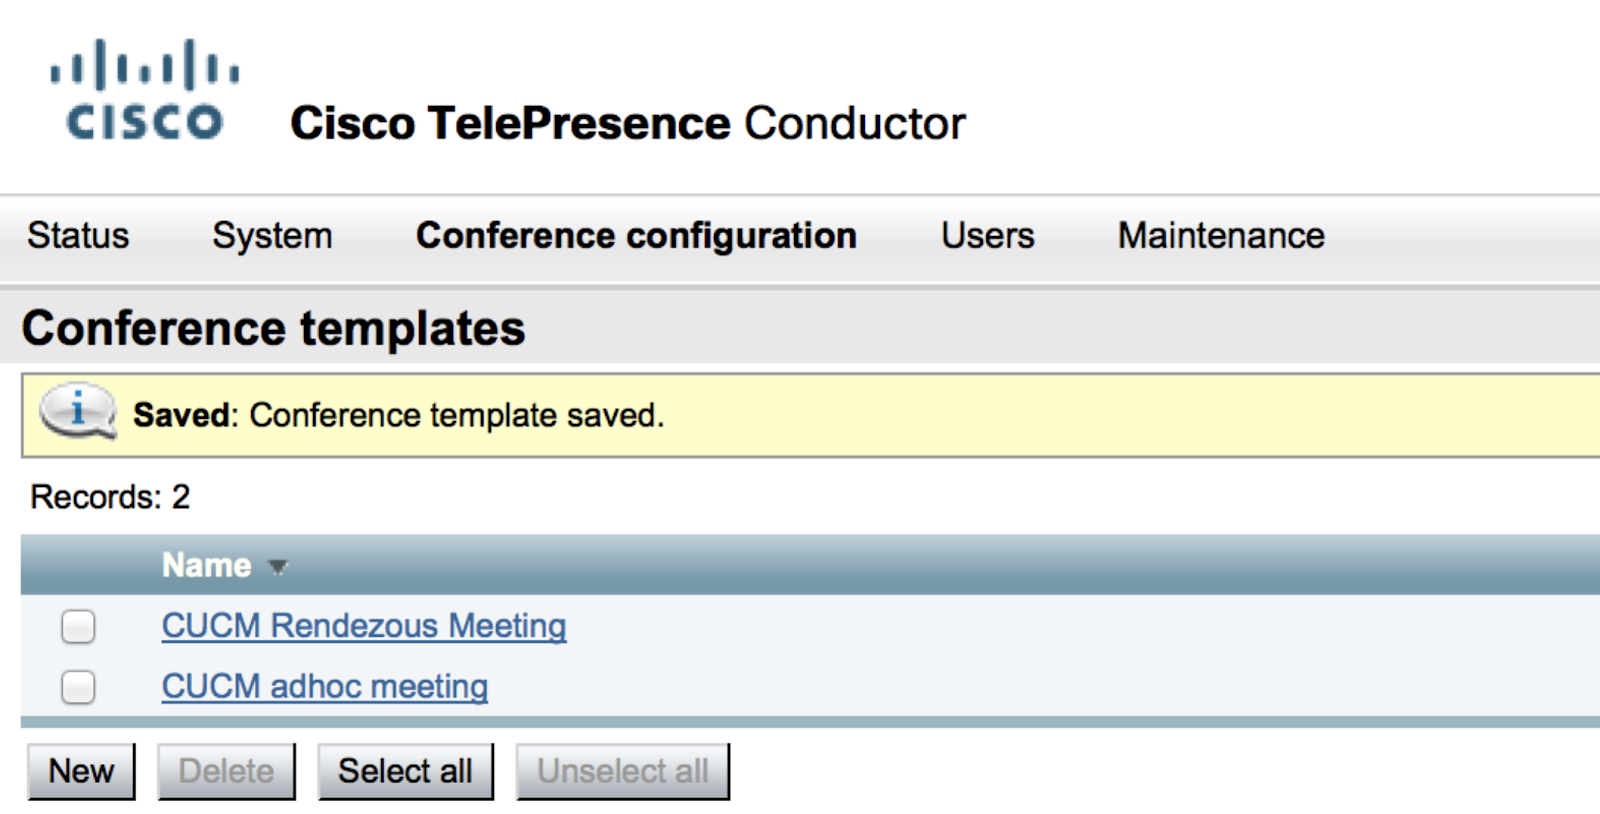
Check that both templates are available.
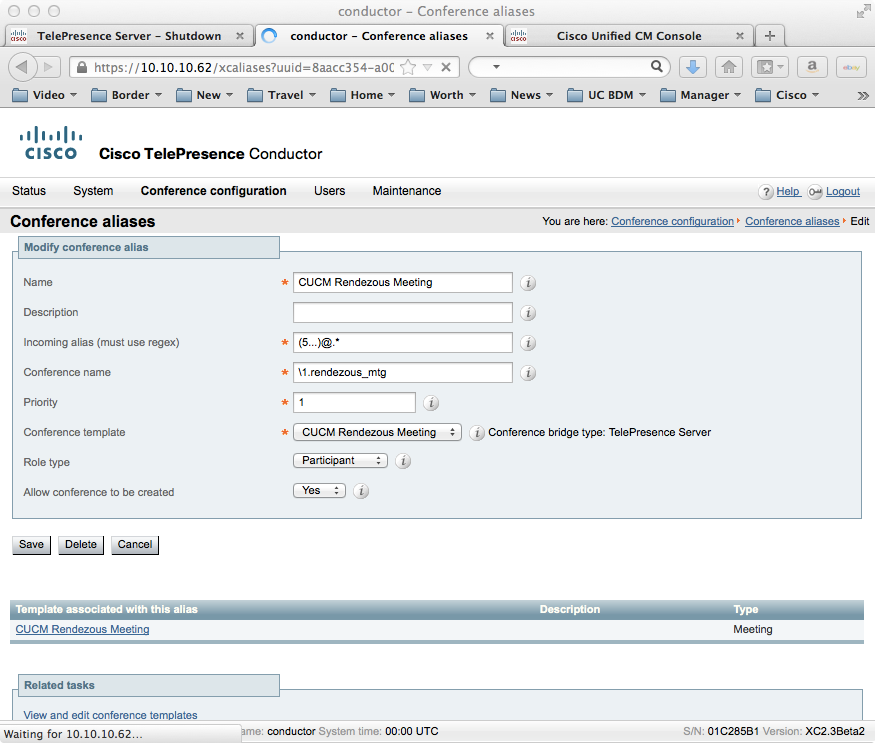
Create Conf Alias.
This is to match the incoming conference pilot number 5XXX and create conference dynamically.
\1.rendezvous_mtg is to append rendezvous_mtg string to the meetme number.
Create Rendezvous Conference Alias (Configuration->Conference aliases)
Click New
Name: CUCM Rendezvous Meeting
Incoming alias: (5…)@.*
Conference name: \1.rendezvous_mtg
Conference template: CUCM Rendezvous Meeting
Click Create conference alias
Click CUCM Rendezvous Meeting
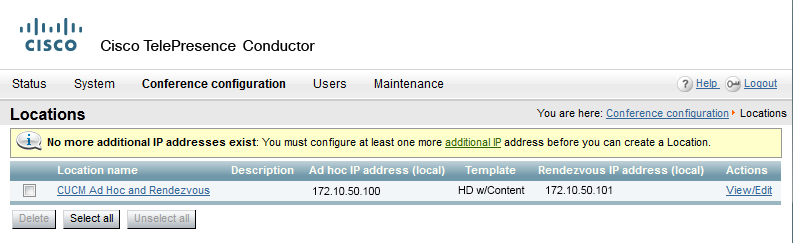
Create CUCM locations on conductor
For each location, 2 IP addresses are needed, one for adhoc resource and one for rendezvous. A conductor can have multiple sets of locations so conductor can handle MCU and TS in the most optimized way.
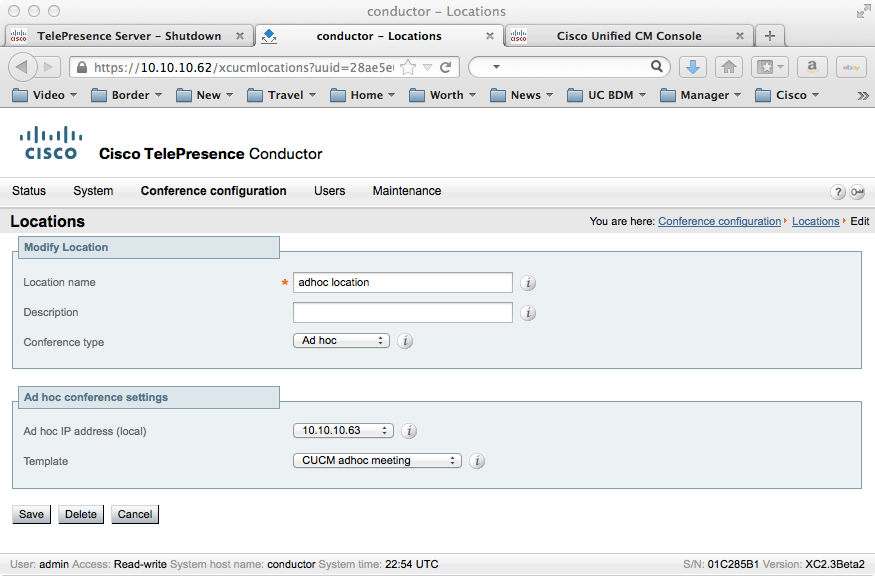
Create the adhoc location (Conference Configuration->Locations)
Create location using adhoc IP address (10.10.10.63) on the conductor.
Click New:
Location name: adhoc location
Conference type: adhoc
Adhoc IP address: 10.10.10.63
Template: CUCM adhoc meeting
Click Add location
Click adhoc location to verify location settings:
Create the rendezvous location (Conference Configuration->Locations)
Create location using rendezvous IP address (10.10.10.64) on the conductor.
Trunk IP address is the CUCM’s IP address (10.10.10.15).
In this lab, to simply configuration steps SIP/TCP is used instead of SIP/TLS for trunk from CUCM to conductor. Use default SIP port 5060.
Click New:
Location name: lab devices
Conference type: Rendezvous
Adhoc IP address: 10.10.10.64
Trunk IP address: 10.10.10.15
Trunk port: 5060
Trunk transport protocol: TCP
Click Add Location
Click lab devices to verify location settings:

Link bridge pool to CUCM location (Conference Configuration->Conference bridge pools)
Click cucm_vts_pool
Only rendezvous location needs to be linked. In Location dropdown, select “lab devices”
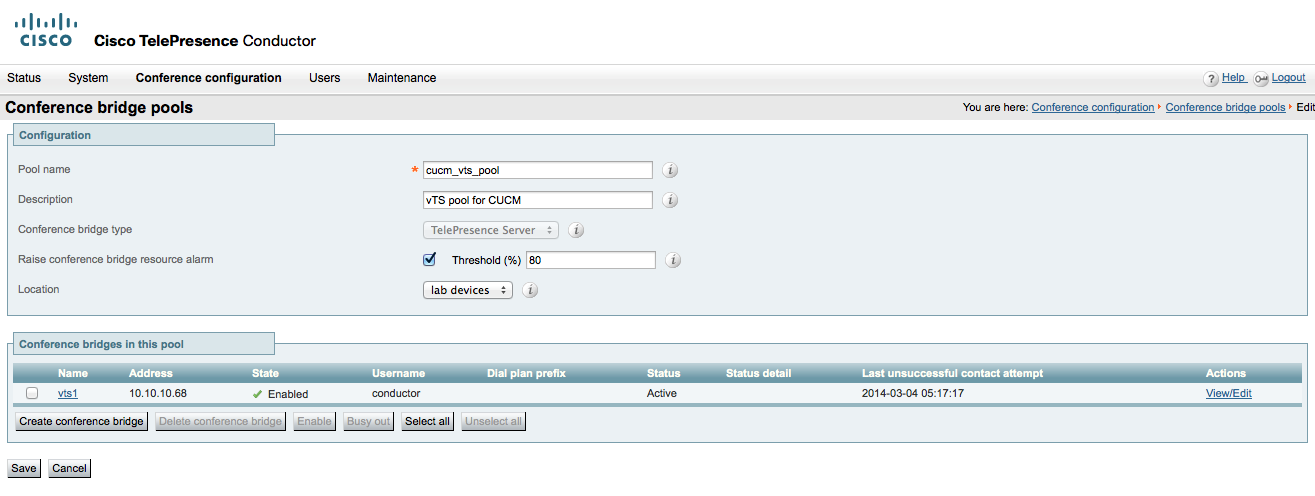
Click Save
Congratulations! Now conductor and vTSes are configured. Now to CUCM…
CUCM Conferencing Configuration
Check System Service Configuration
Username: admin
Password: C1sc0123
Make sure the location BW setting is correct ! Please check BW setting under System->Location Info->location. Depending on the network capacity, configure it accordingly. For this lab, we assume unlimited bandwidth.
Click Add New
Configure following:
Location:Hub_none.
Name: lab
Video Bandwidth: Unlimited
Immersive Video Bandwidth: Unlimited

Click Save
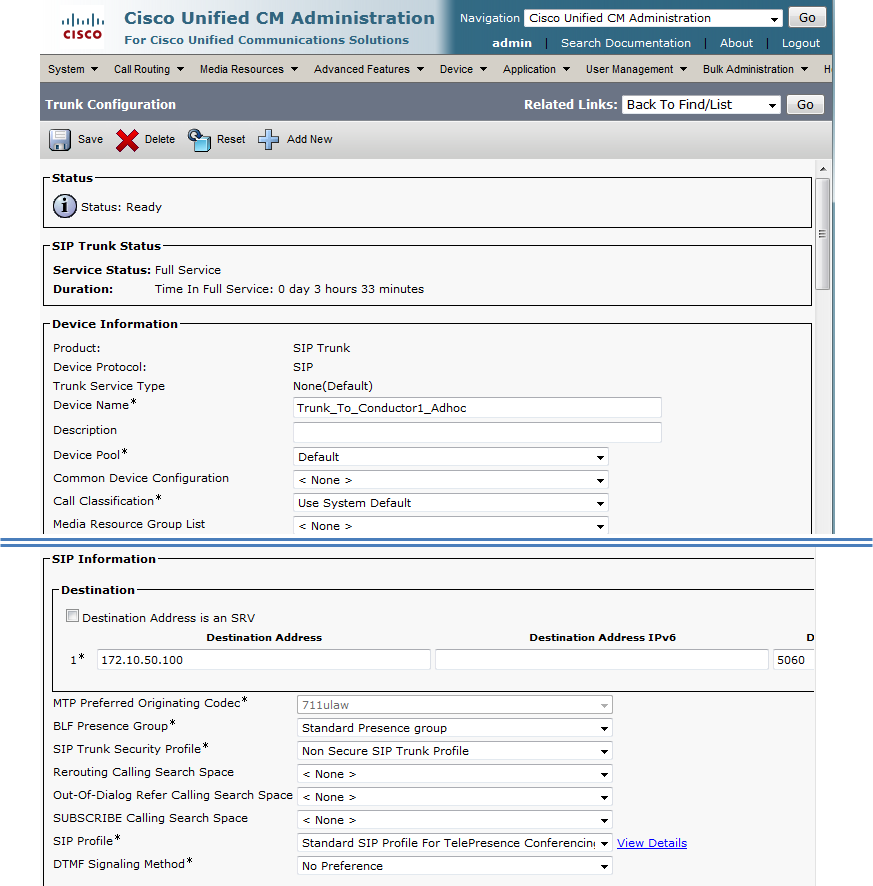
Add SIP trunks
Add 2 SIP trunks from CUCM to conductor, one for adhoc and one for rendezvous.
Configure Rendezvous SIP trunk first (Device > Trunk)
Click Add New
Apply following settings:
Trunk Type: SIP
Trunk Service Type: None(Default)
Click Next
Device Name: trunk_rendezvous_to_conductor
Device Pool: DP_lab
Location: Hub_none
Run on all cucm nodes: checked
SIP destination IP address: 10.10.10.64 Destination port 5060
SIP Trunk Security Profile: Non Secure SIP Trunk Profile
SIP Profile: Standard SIP Profile For TelePresence Conferencing


Click Save
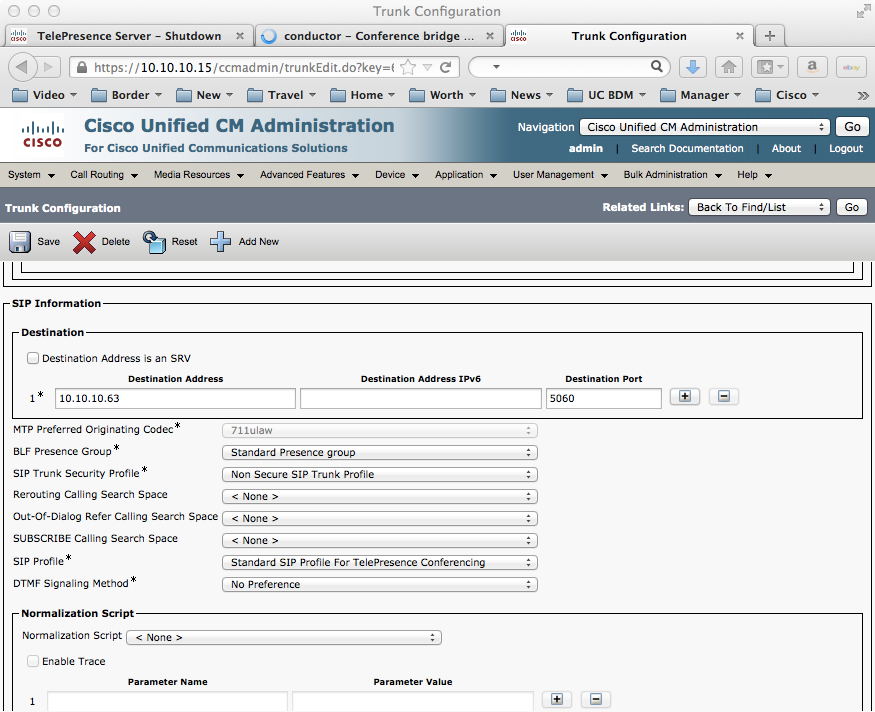
Add adhoc trunk
Configure adhoc SIP trunk next (Device > Trunk)
Click Add New
Apply following:
Trunk Type: SIP
Trunk Service Type: None(Default)
Click Next
Apply following:
Device Name: Trunk_adhoc_to_Conductor
Device Pool: DP_lab
Location: Hub_none
Run on all cucm nodes: checked
SIP destination IP address: 10.10.10.63 Destination port 5060
SIP Trunk Security Profile: Non Secure SIP Trunk Profile
SIP Profile: Standard SIP Profile For TelePresence Conferencing

<BZ: Change media Resource Group List above to None.>
Reset both Adhoc & Rendezvous trunks (Device > Trunk)
Click Find button
Check all SIP trunks, click Reset Selected
Click Reset. Click Close
Add conductor to a MRG and MRGL
Create a conference bridge resource (Media Resources > Conference Bridge) use adhoc SIP trunk as the SIP trunk and the admin user you have created on conductor for CUCM (cucmuser/C1sc0123).
Click Add New
Conference bridge type: Cisco TelePresence Conductor
Conference bridge name: conductor_adhoc
SIP trunk: Trunk_adhoc_to_Conductor
Username: cucmuser
Password: C1sc0123
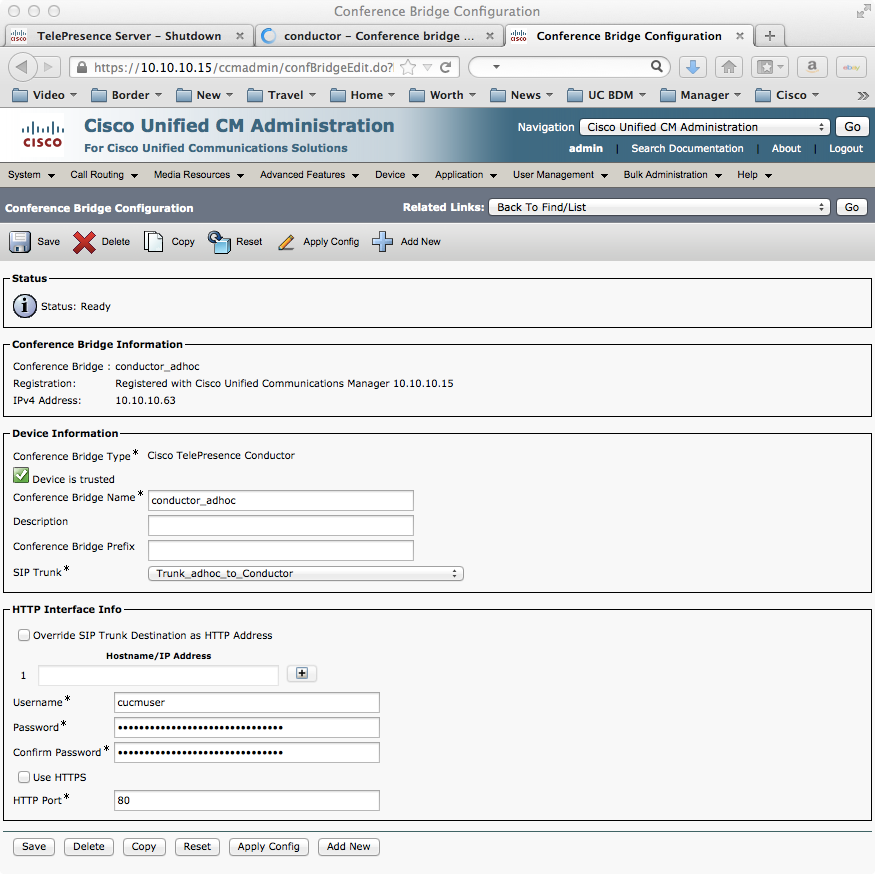
Click Save
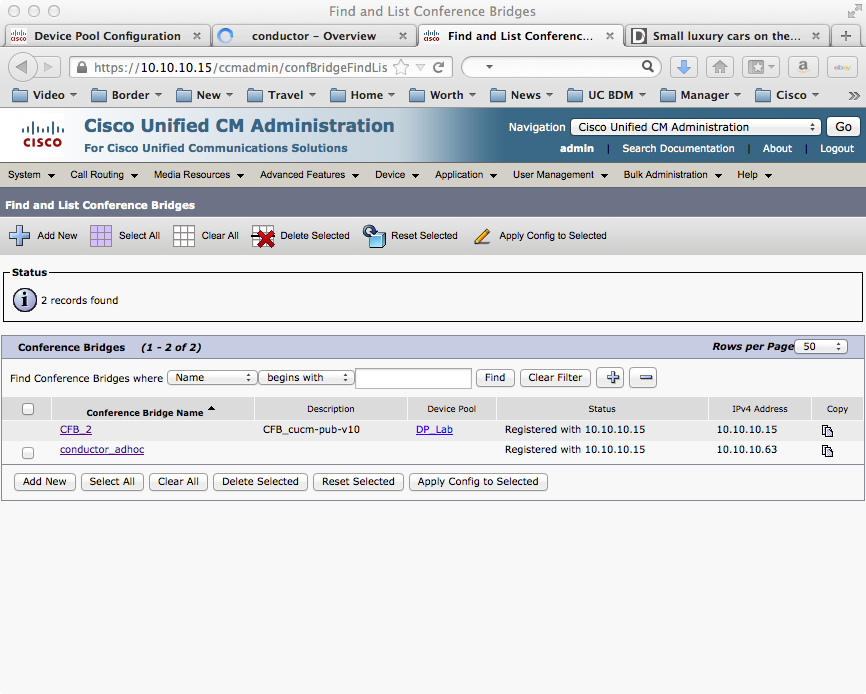
Verify bridge resource has been registered with CUCM (Media Resources > Conference Bridge)
If bridge is not registered, reset SIP trunk
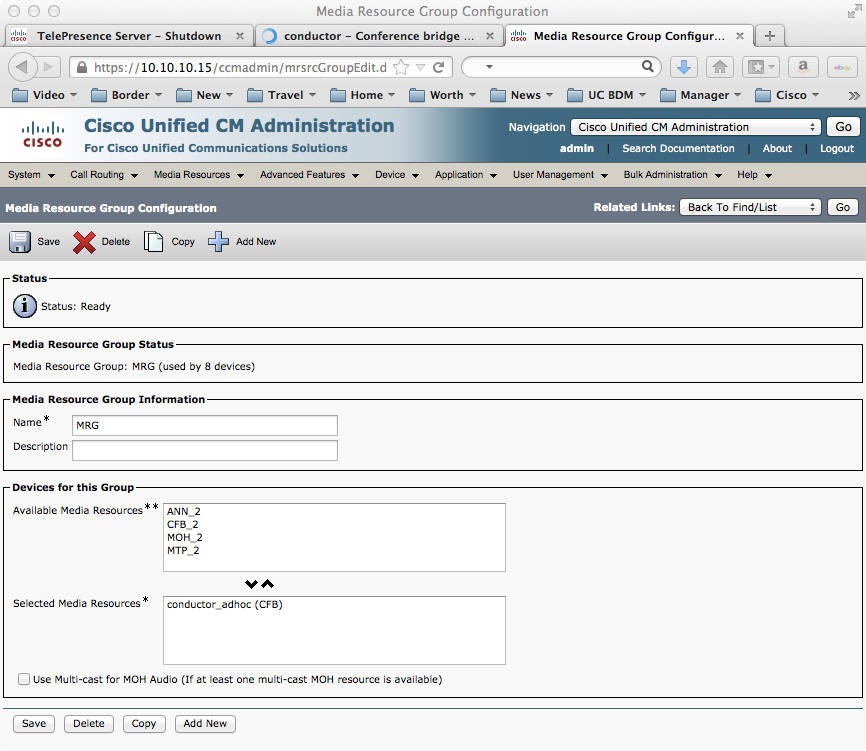
Create a new MRGL (Media Resources > Media Resources Group)
Click Add New
Apply following:
Name: MRG
Selected Media Resources: Add conductor_adhoc
Click Save
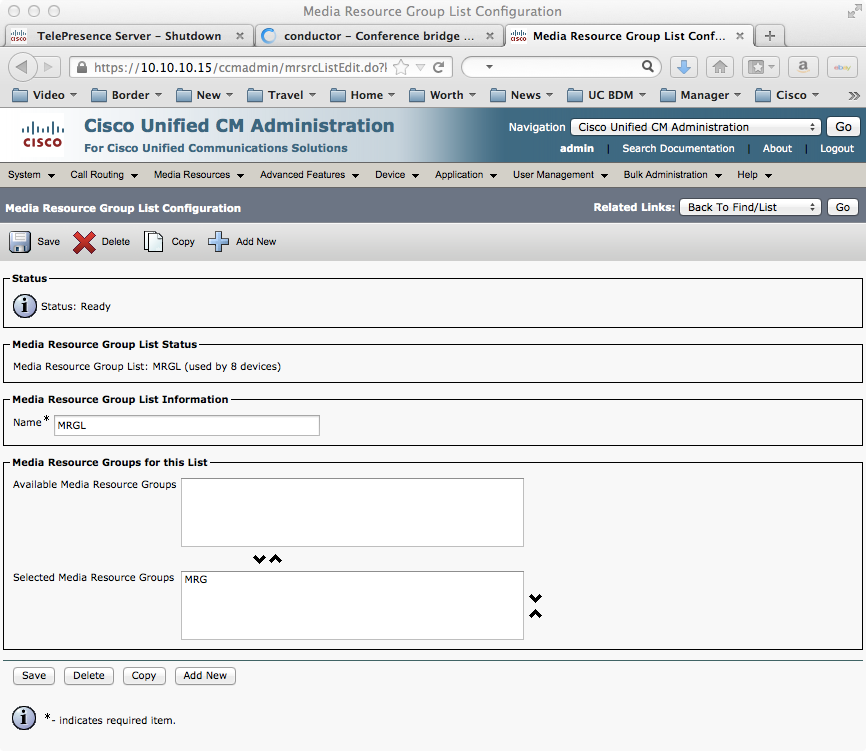
Create a new MRGL (Media Resources > Media Resources Group List)
Click Add New
Apply following:
Name: MRGL
Selected Media Resource Groups: Add MRG
Click Save
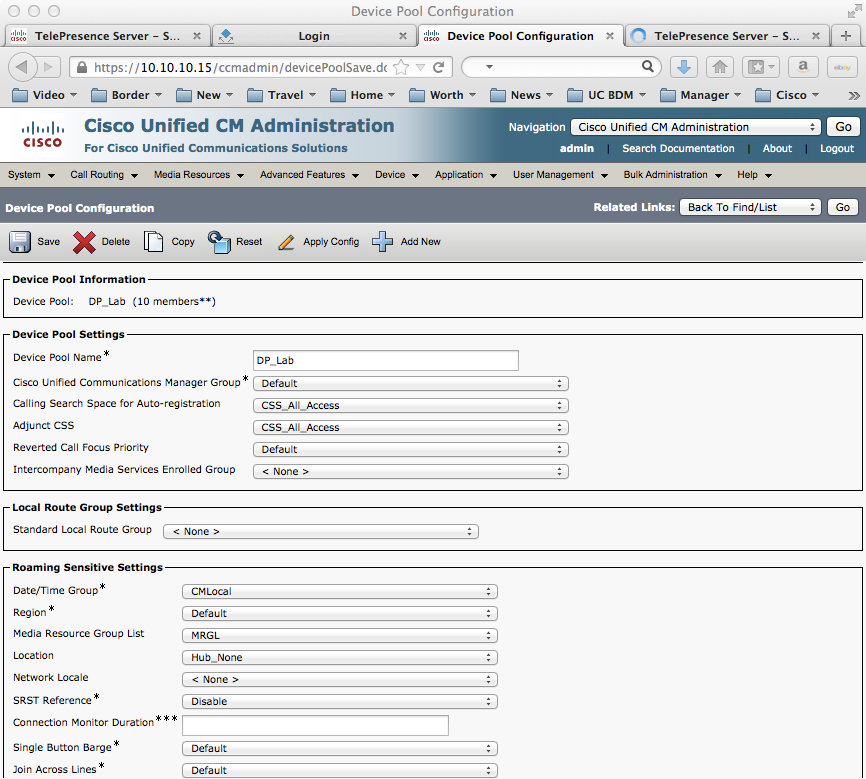
Add MRGL to the resource pool (System->device pool)
Click Find
The preconfigured device pool DP_lab should appear.
Click DP_Lab
Apply following:
Media Resource Group List: MRGL
Click Save
Click Reset & click Reset again to apply changes.
<BZ: Change Adjust CSS, CSS for auto-reg>
Add rendezvous pilot number range to the route list (Call Routing->Route/Hunt -> Route Pattern)
Click Add New
Apply following:
Route pattern: 5XXX
Route partition: PT_local
Gateway/RL: Trunk_Rendenzvous_to_Conductor
Call classification: on-net
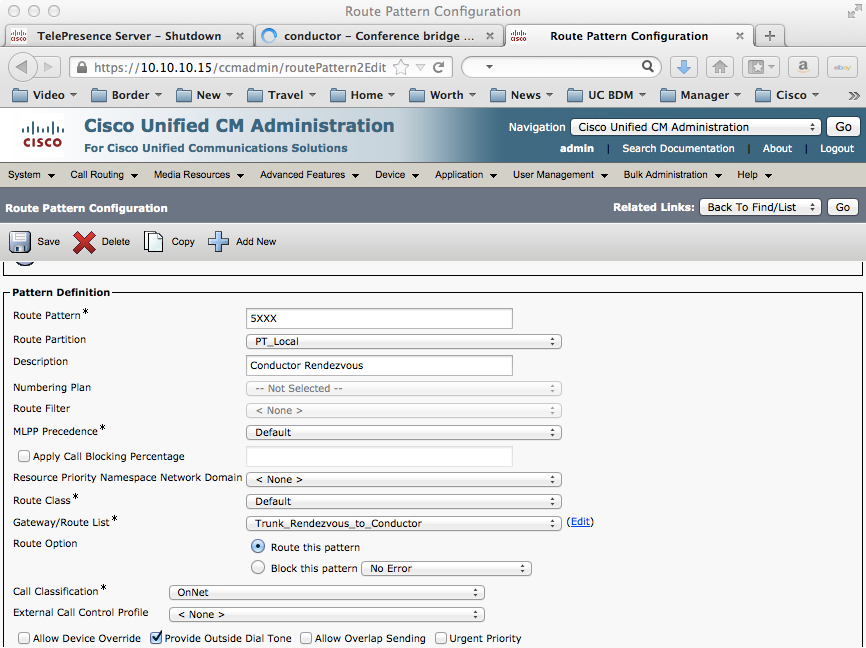
Click Save
Congratulations ! now you have configured conductor and vTS to be used as conference resource for adhoc and rendezvous.
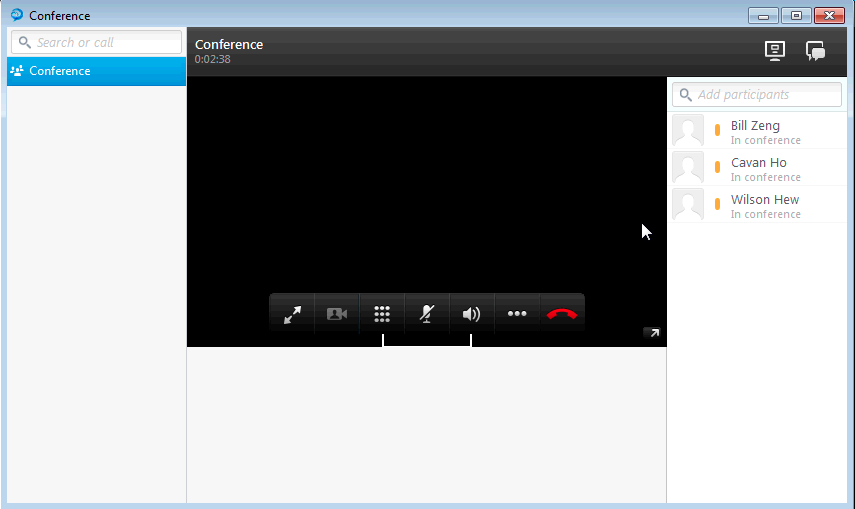
Verifying
At the moment, the lab hasn’t configured the EX90 and VCS yet. You have Jabber worksations to verify only. You can try out the following:
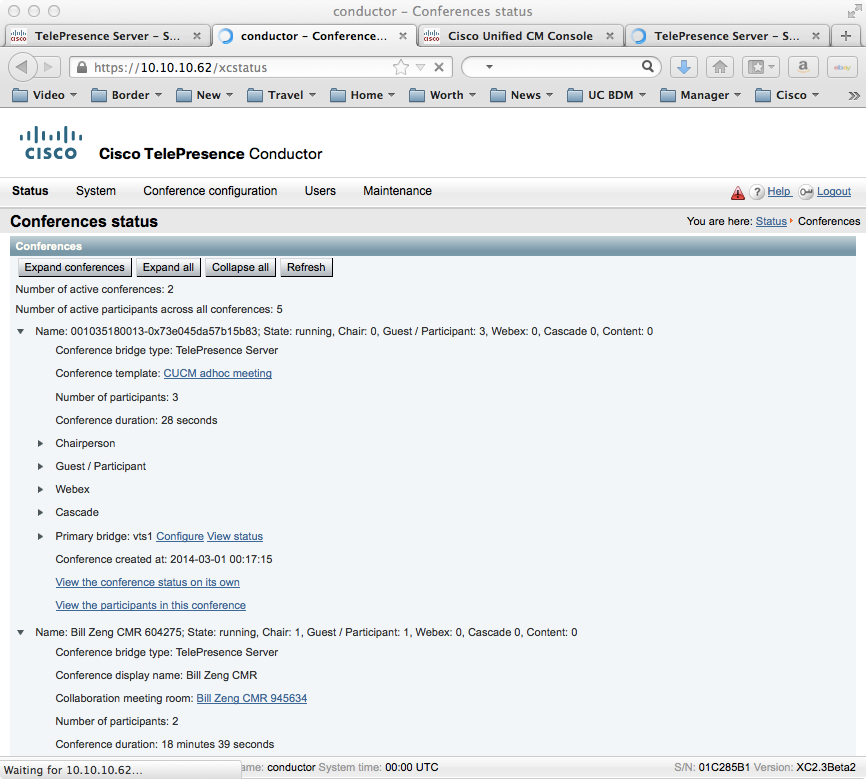
Test adhoc Conferencing
- Student 1 calls student 2;
- Press conference button;
- Add in student 3.
You should see all three are on a conference. From the conductor, you should see one adhoc meeting with 3 partipants.
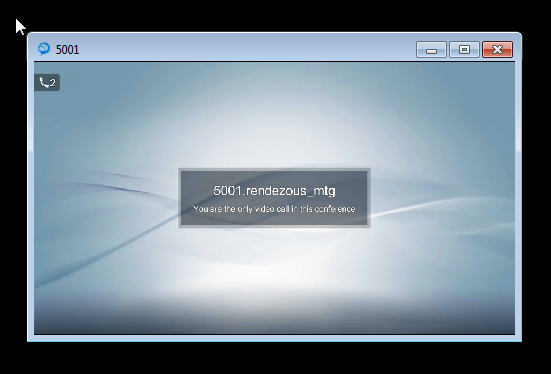
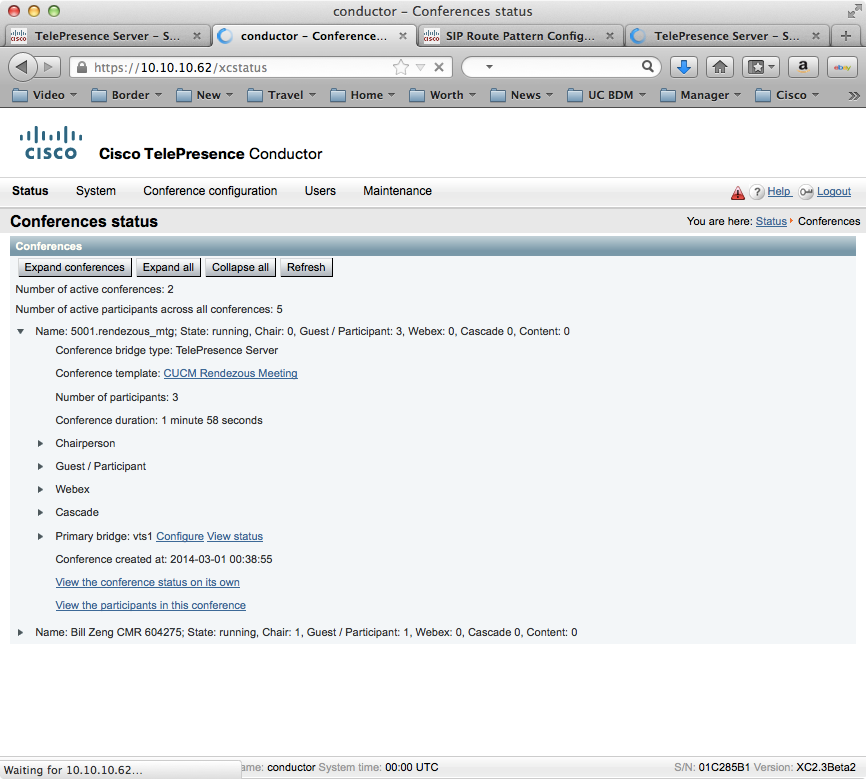
Test Rendezvous
All three students dial to 5001. You should see 5001.rendezvous_mtg
Appendix: CUCM 10.0 Enhancements for Ad Hoc Video Conferencing
Unified CM 10.0 Enhancements for Ad Hoc Video Conferencing
These enhancements include the following:
- Addition of “Cisco TelePresence Conductor” option in “Conference Bridge Type” pull-down menu
- Cisco TelePresence Conductor and Cisco TelePresence MCU conference bridge types now require an existing SIP trunk to be referenced
- Ability to specify a different address for HTTP API traffic than that used in the SIP trunk
- Addition of a “Conference Bridge Prefix” in both Conductor and MCU configuration
These enhancements are discussed in detail and with screenshots below.
Addition of “Cisco TelePresence Conductor” option in “Conference Bridge Type” pull-down menu:
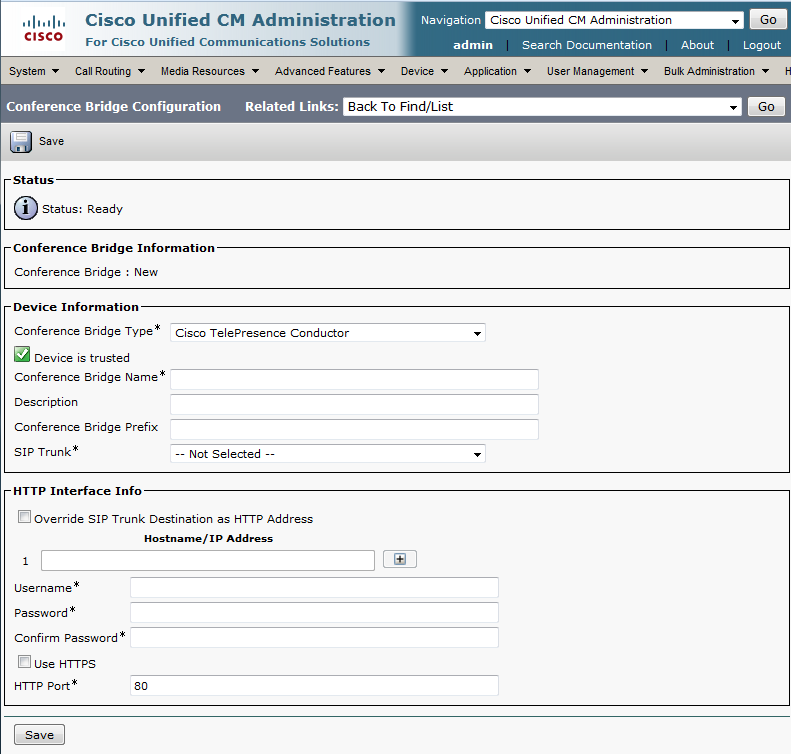
Now there is an option specifically for the Cisco TelePresence Conductor to be added as a Unified CM ad hoc conference bridge. The Unified CM options and configuration of “Cisco TelePresence Conductor” are the same for “Cisco TelePresence MCU”
Conductor Integration with Unified CM 10.0
Conductor integration with Unified CM remains largely unchanged. The enhancements discussed in the previous section mostly pertain to Cisco MCUs being used as ad hoc and rendezvous resources without a Conductor deployed.
The one change in Unified CM 10.0, is that using Conductor as an ad hoc Conference Bridge requires a SIP trunk being configured first. Conductor must still have dedicated IP address for both Ad Hoc and Rendezvous conferences. Unified CM 10.0 must have separate SIP Trunks, one for Ad Hoc and one for Rendezvous conference.
Thank you so much. I followed your guide and it worked like charm!
ReplyDeleteyeah, TPS works perfectly in my company
DeleteThanks for your help!!
ReplyDelete